Cloudflare
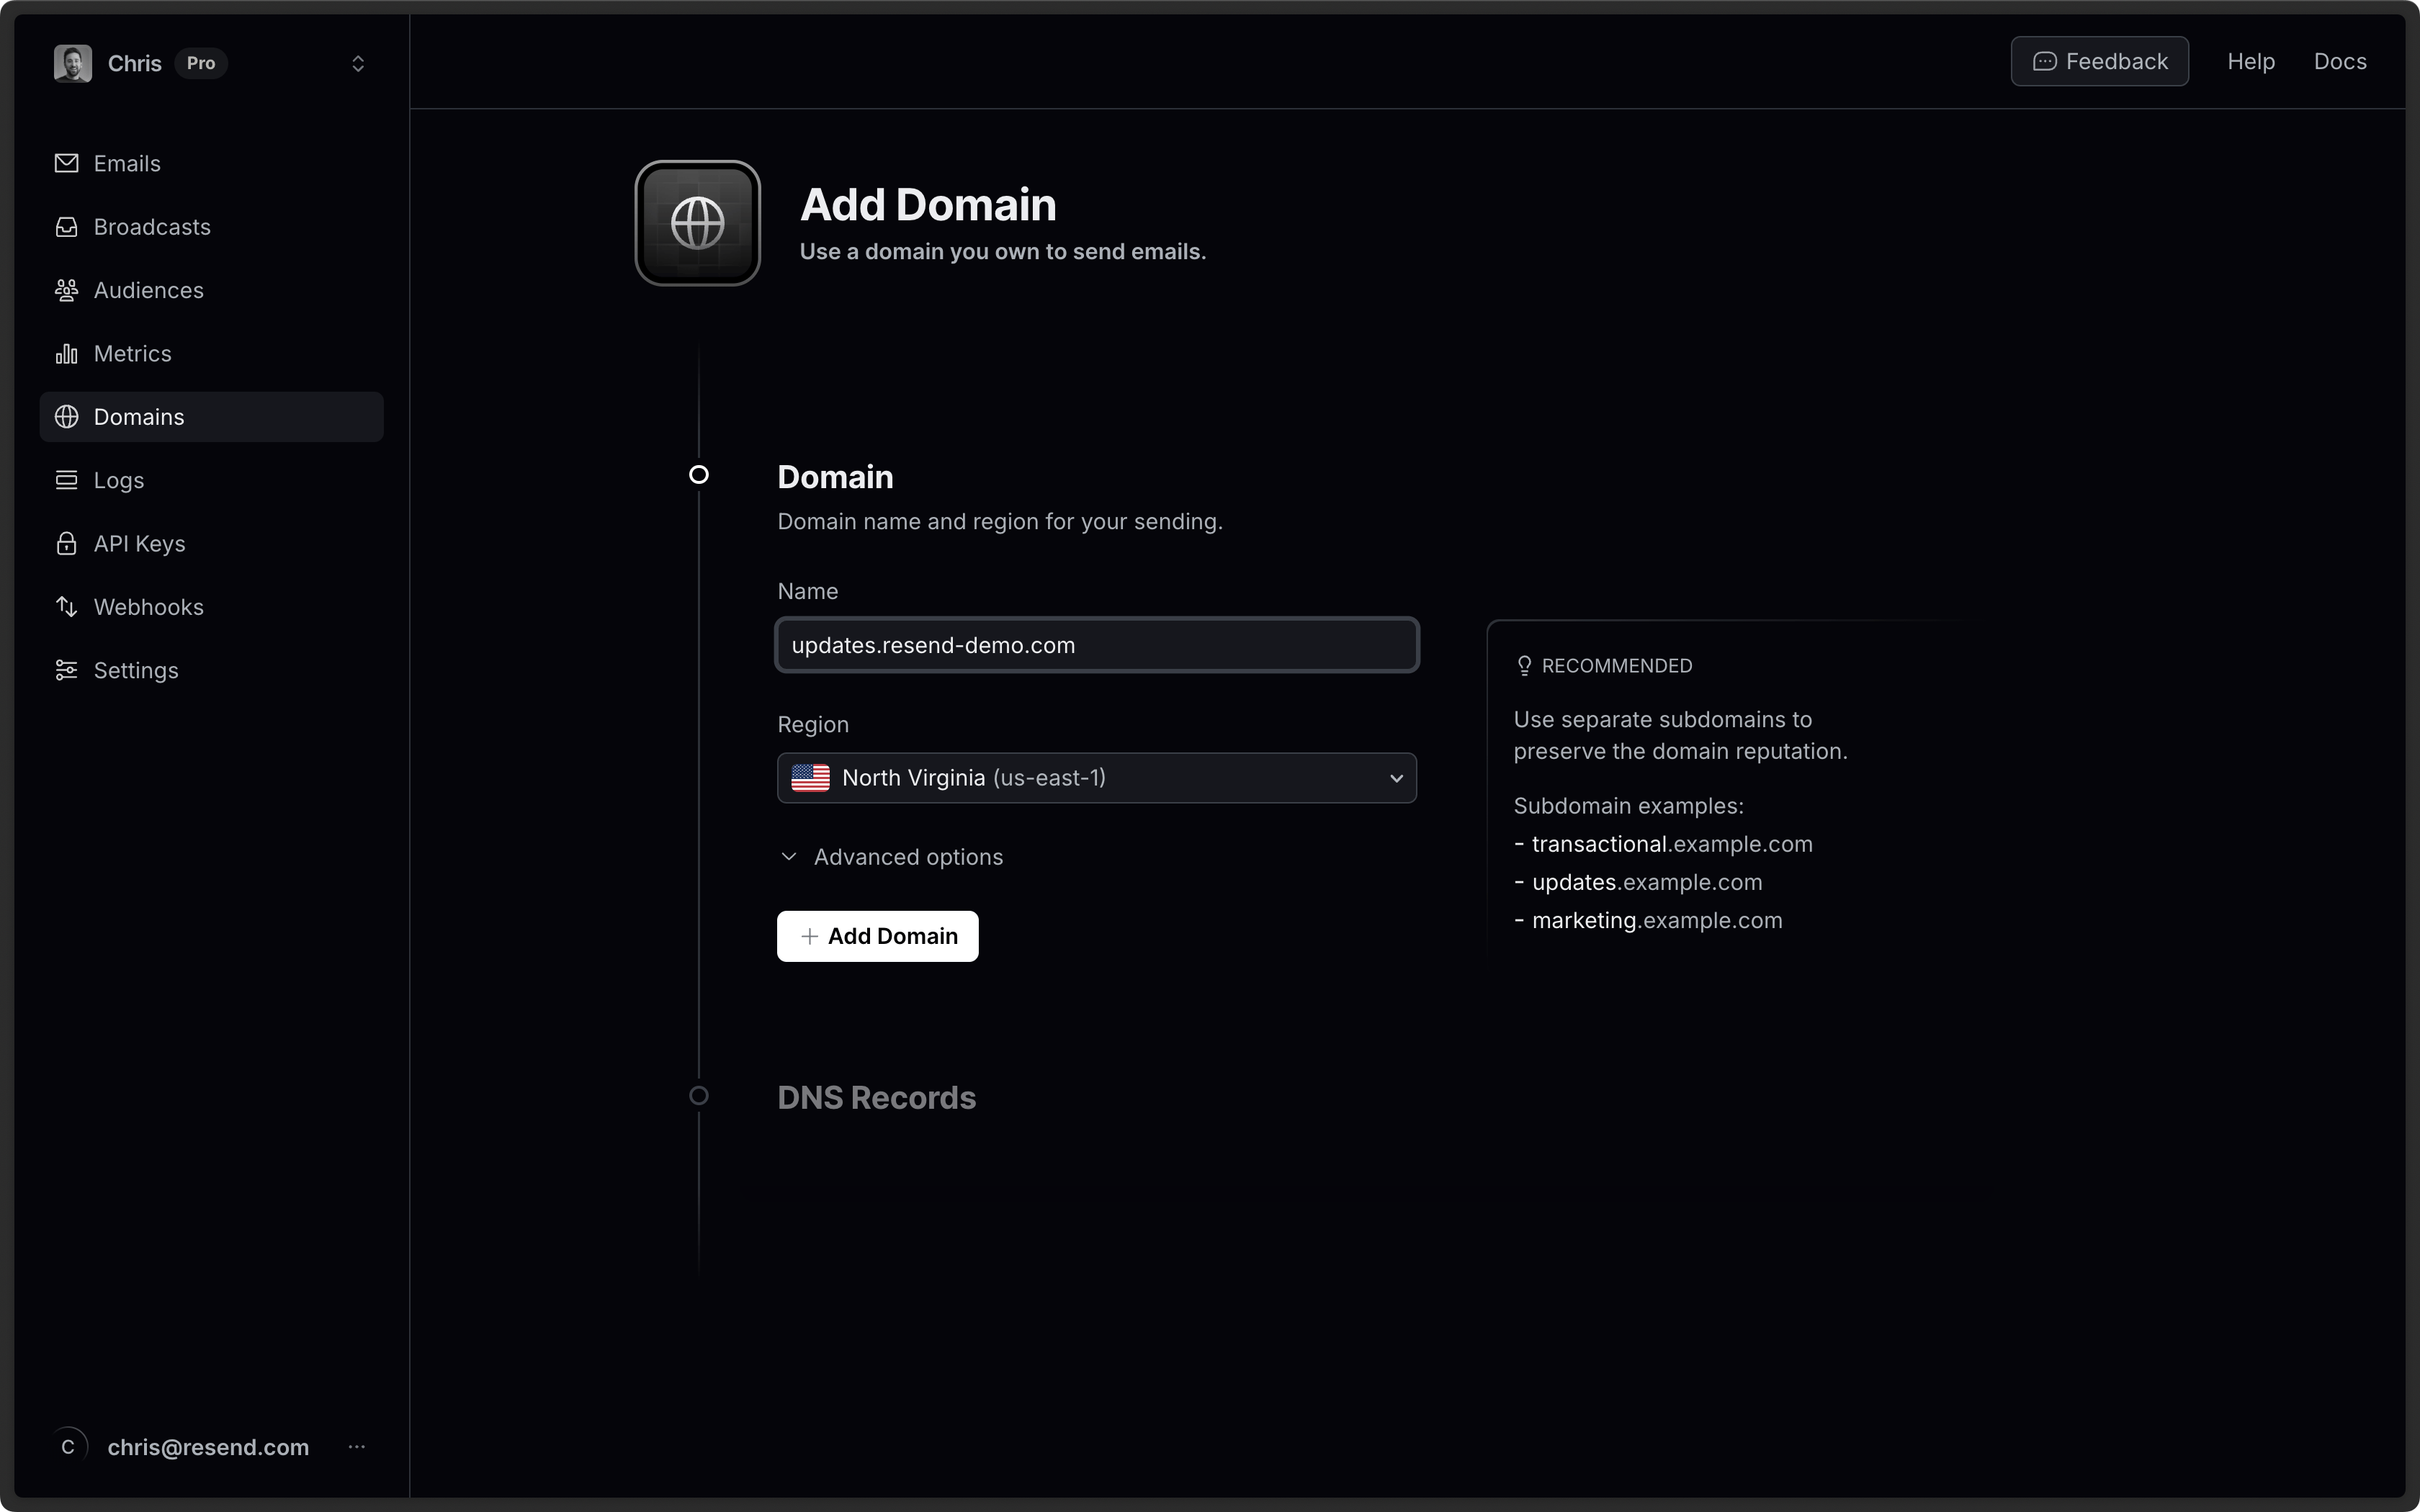
Add Domain to Resend
Section titled “Add Domain to Resend”First, log in to your Resend Account and add a domain.
Automatic Setup (Recommended)
Section titled “Automatic Setup (Recommended)”The fastest way to verify your domain on Cloudflare is using the Sign in to Cloudflare button on Resend. This uses Domain Connect to automatically configure your DNS records.
- Go to your Domains page in Resend.
- (Optional) If you want to receive emails, select
Manual setupand toggle the "Receiving" switch on the domain details page. (Learn more below) - Click Sign in to Cloudflare button.
- Authorize Resend to access your Cloudflare DNS settings.
- The DNS records will be added automatically.
That's it. Your domain will be verified within a few minutes.
Manual Setup
Section titled “Manual Setup”If you prefer to add DNS records manually, follow these steps.
Log in to Cloudflare
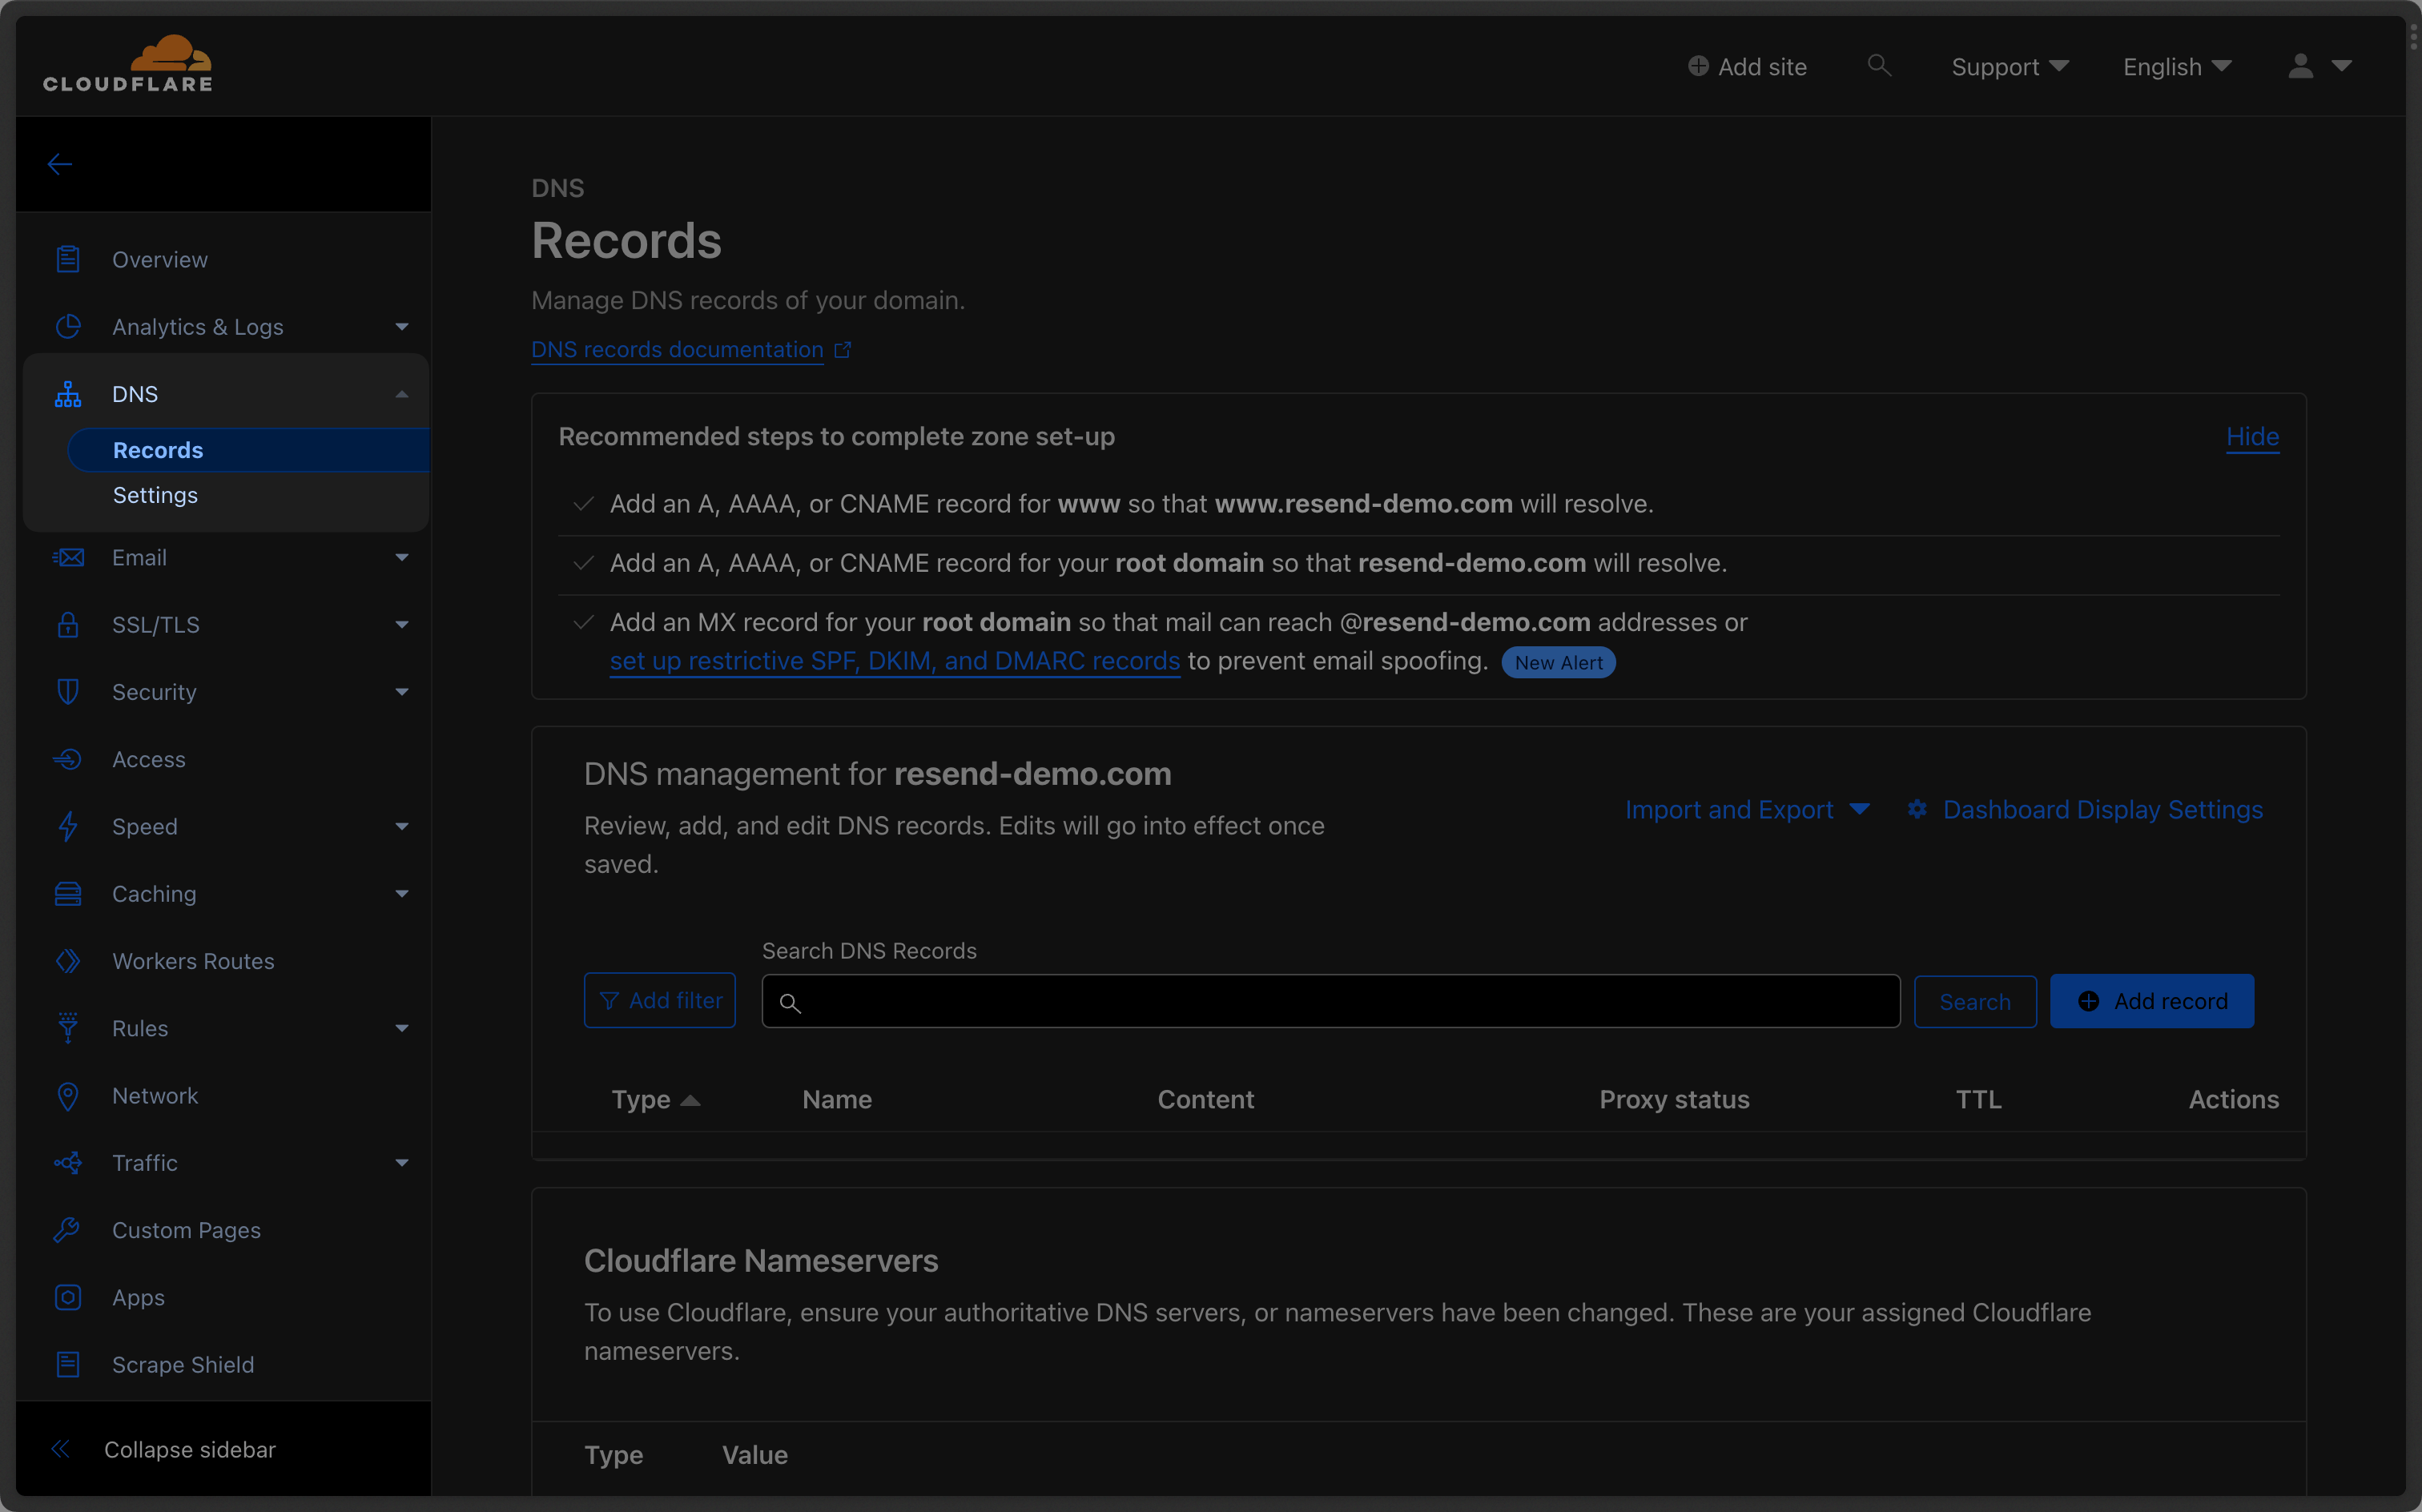
Section titled “Log in to Cloudflare”Log in to your Cloudflare account and go to the DNS Records of your domain.
Add MX SPF Record
Section titled “Add MX SPF Record”Click "Add Record" on Cloudflare:
- Set the Type to
MX. - Type
sendfor theNameof the record. - Copy the MX Value from Resend into the
Mail Serverfield. - Use the default
AutoforTTL. - Add
10for thePriority. - Select
Save.
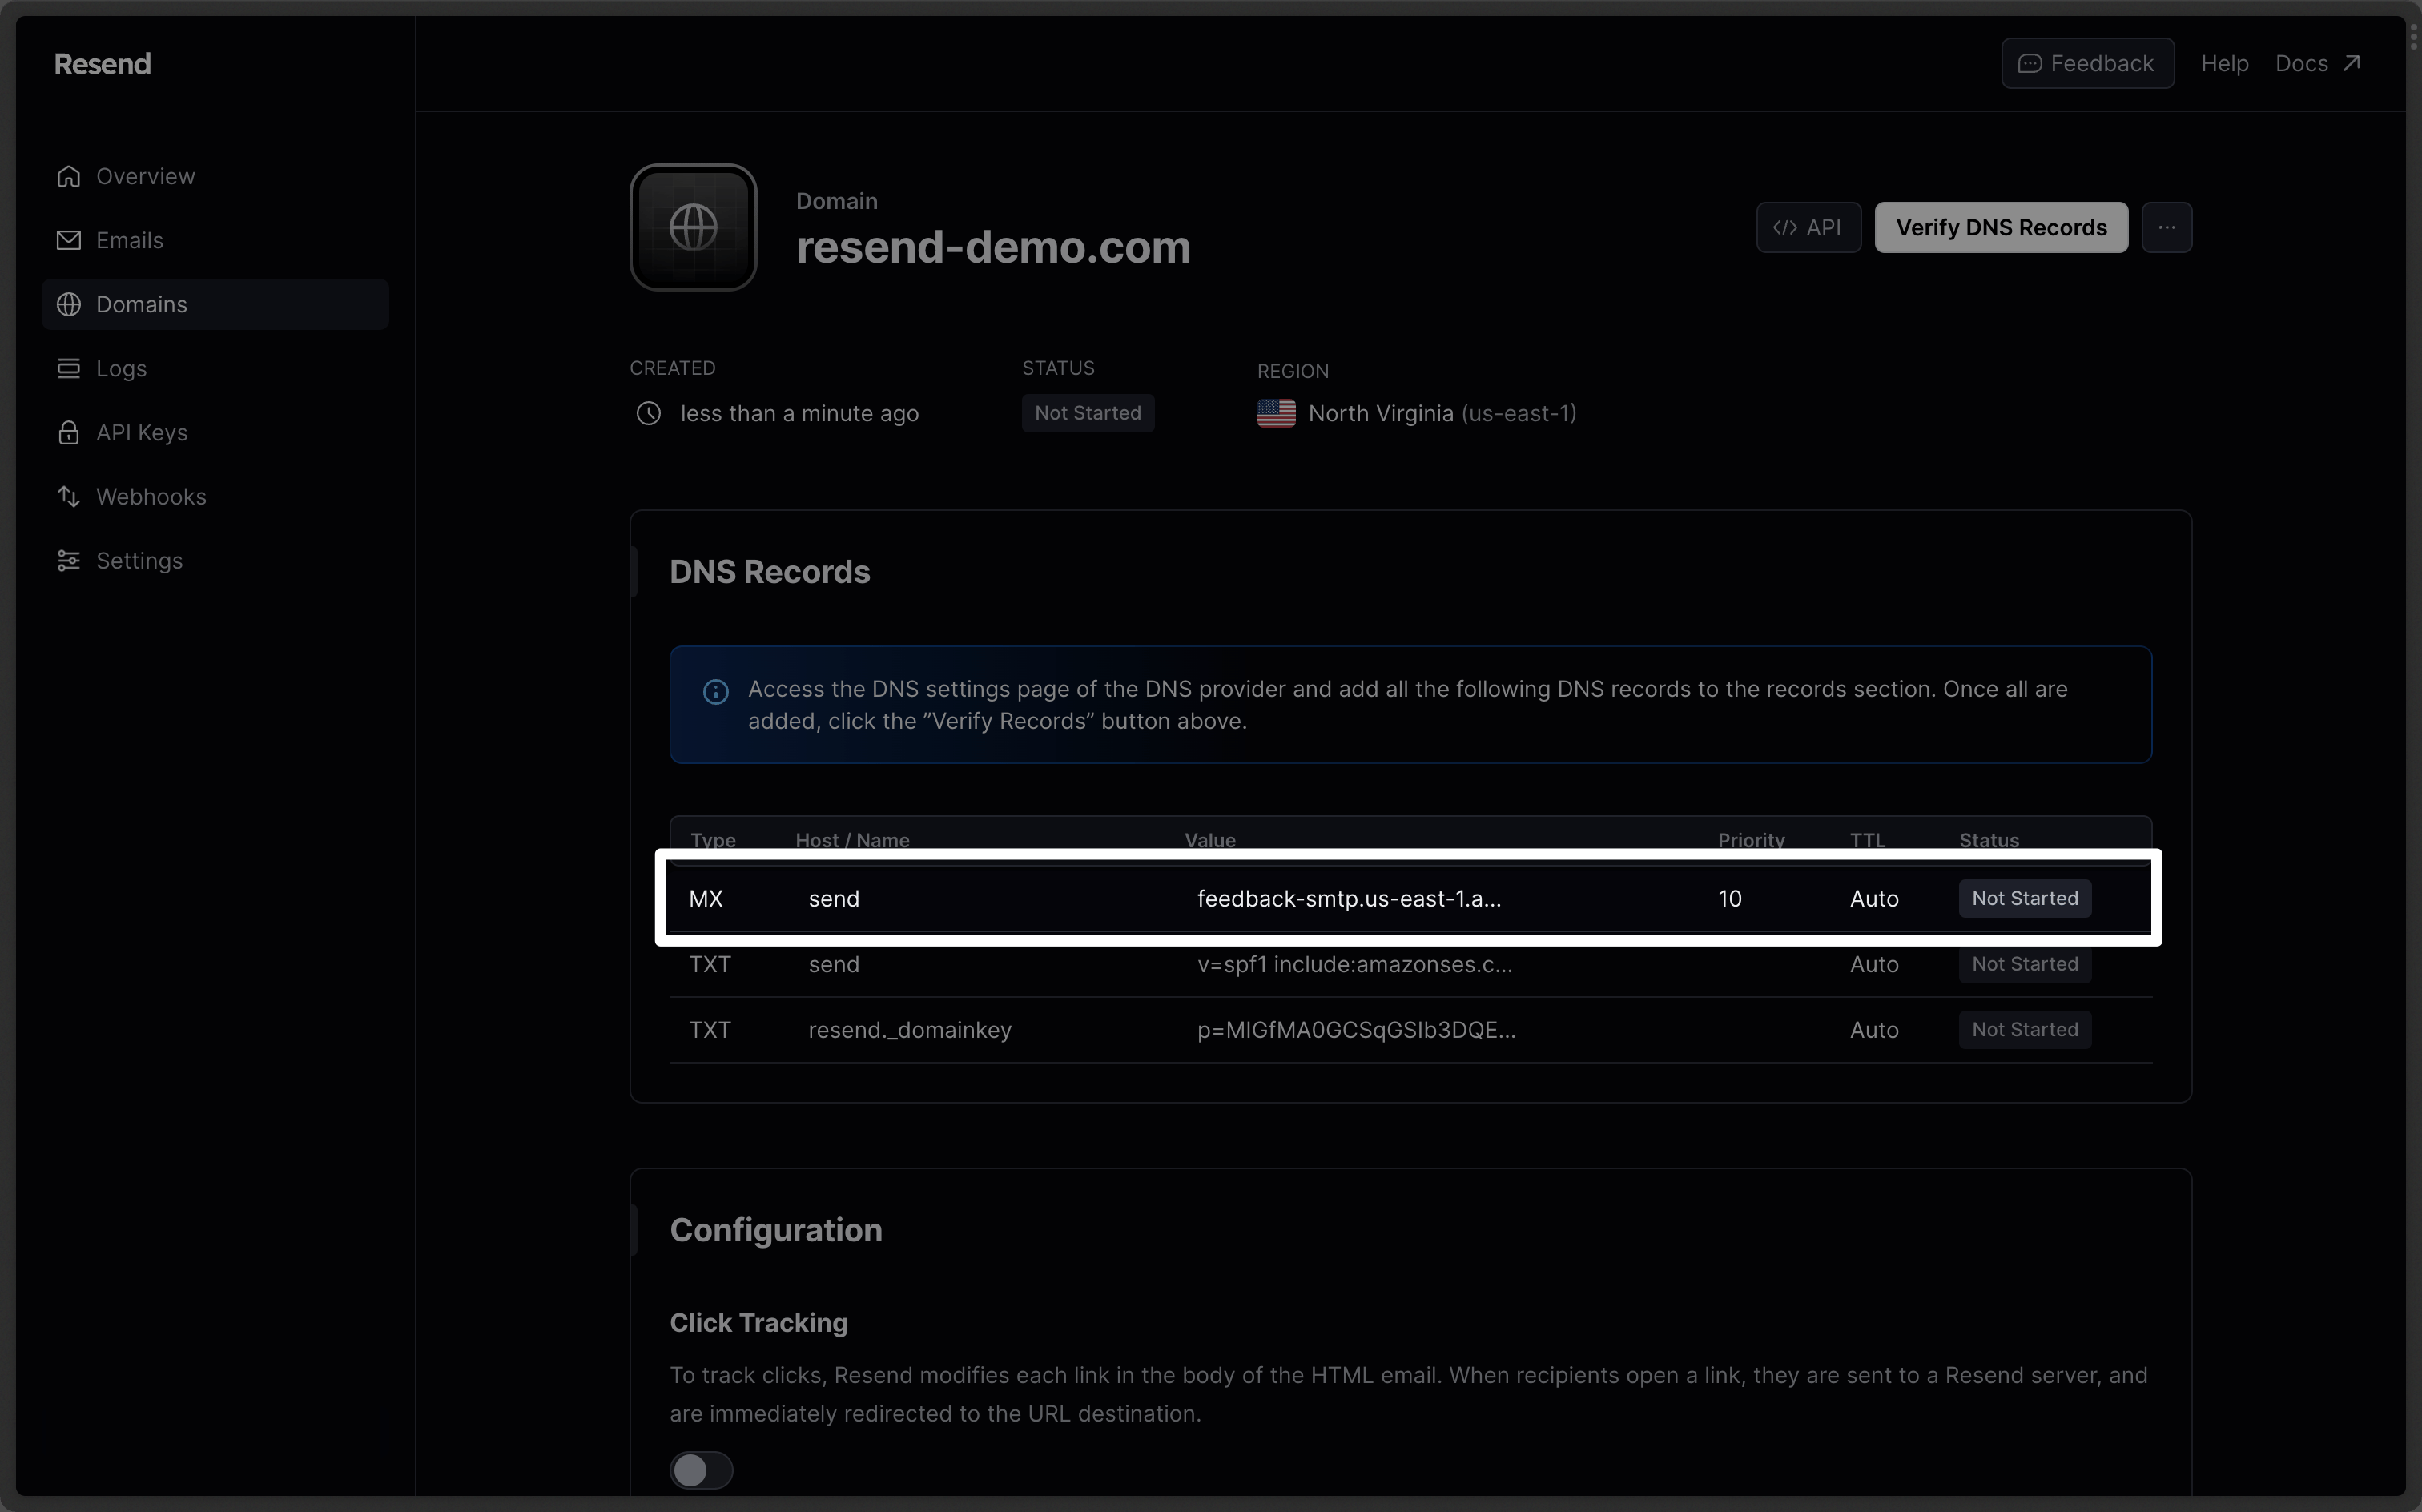
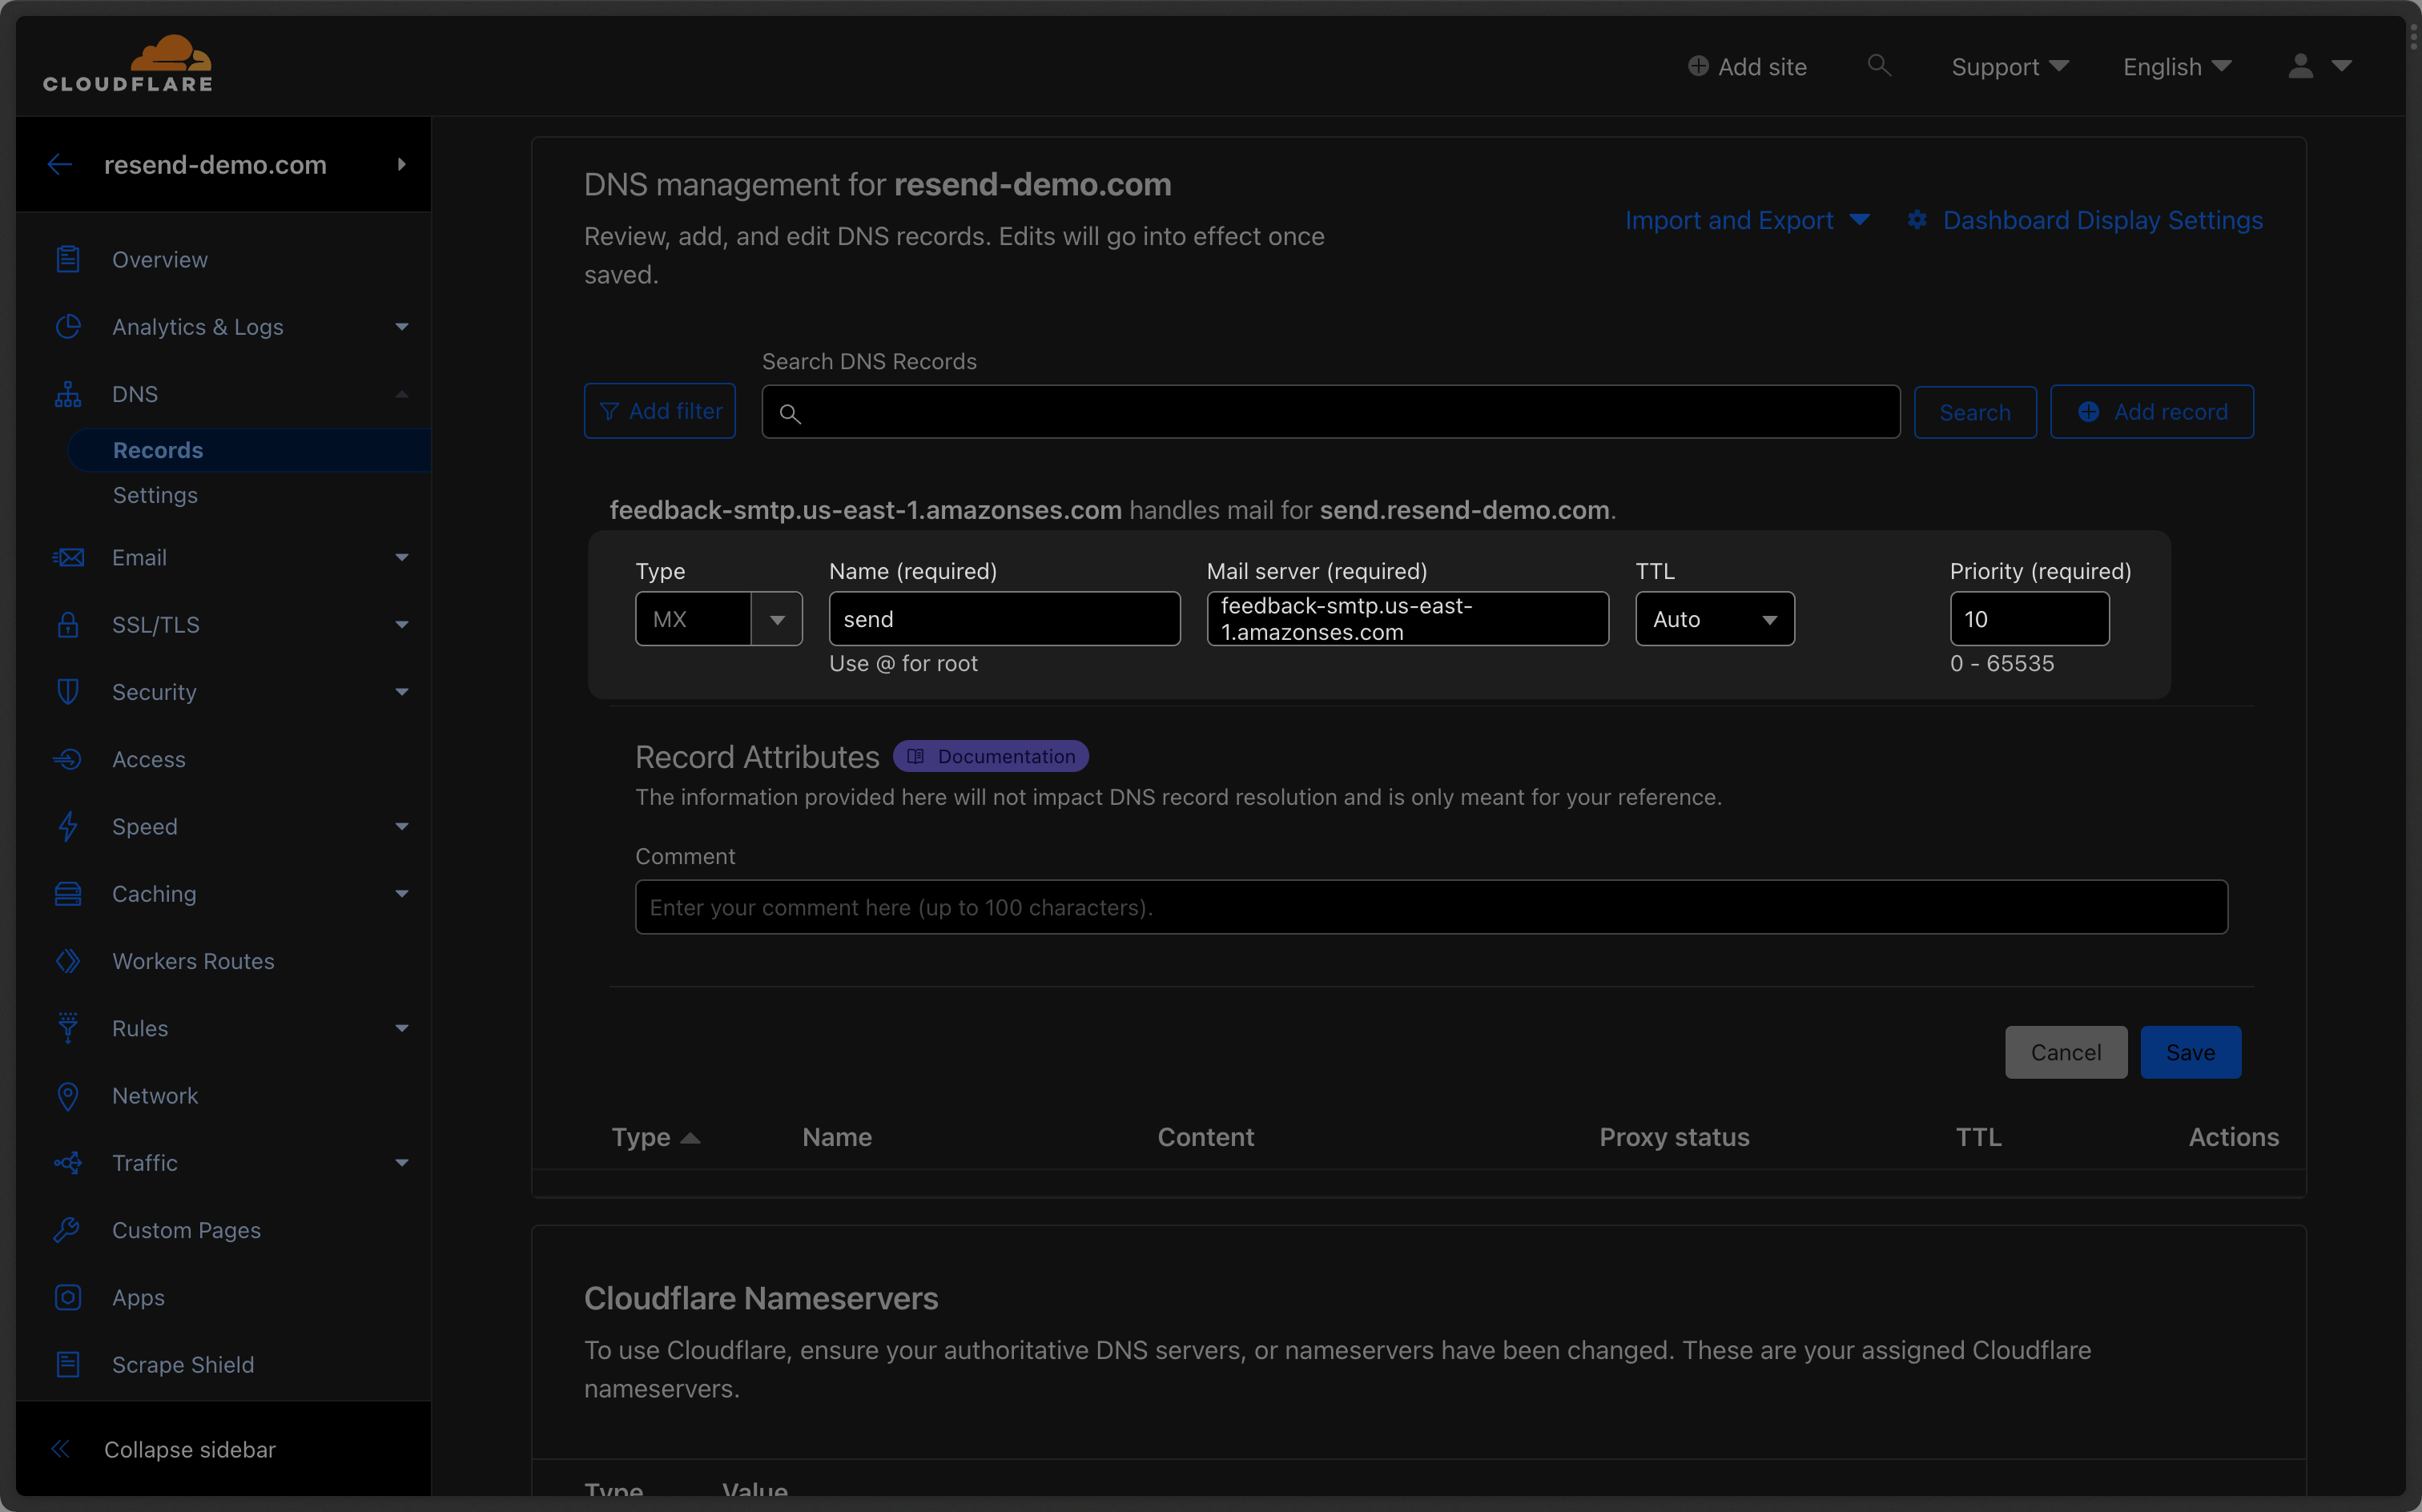
Below is a mapping of the record fields from Resend to Cloudflare:
| Cloudflare | Resend | Example Value |
|---|---|---|
| Type | Type | MX |
| Name | Name | send |
| Mail Server | Content | feedback-smtp.us-east-1.amazonses.com |
| Priority | Priority | 10 |
Add TXT SPF Record
Section titled “Add TXT SPF Record”Click "Add Record" on Cloudflare:
- Set the Type to
TXT. - Type
sendfor theNameof the record. - Copy the TXT Value Resend into
Contentfield. - Use the default
AutoforTTL. - Select
Save.
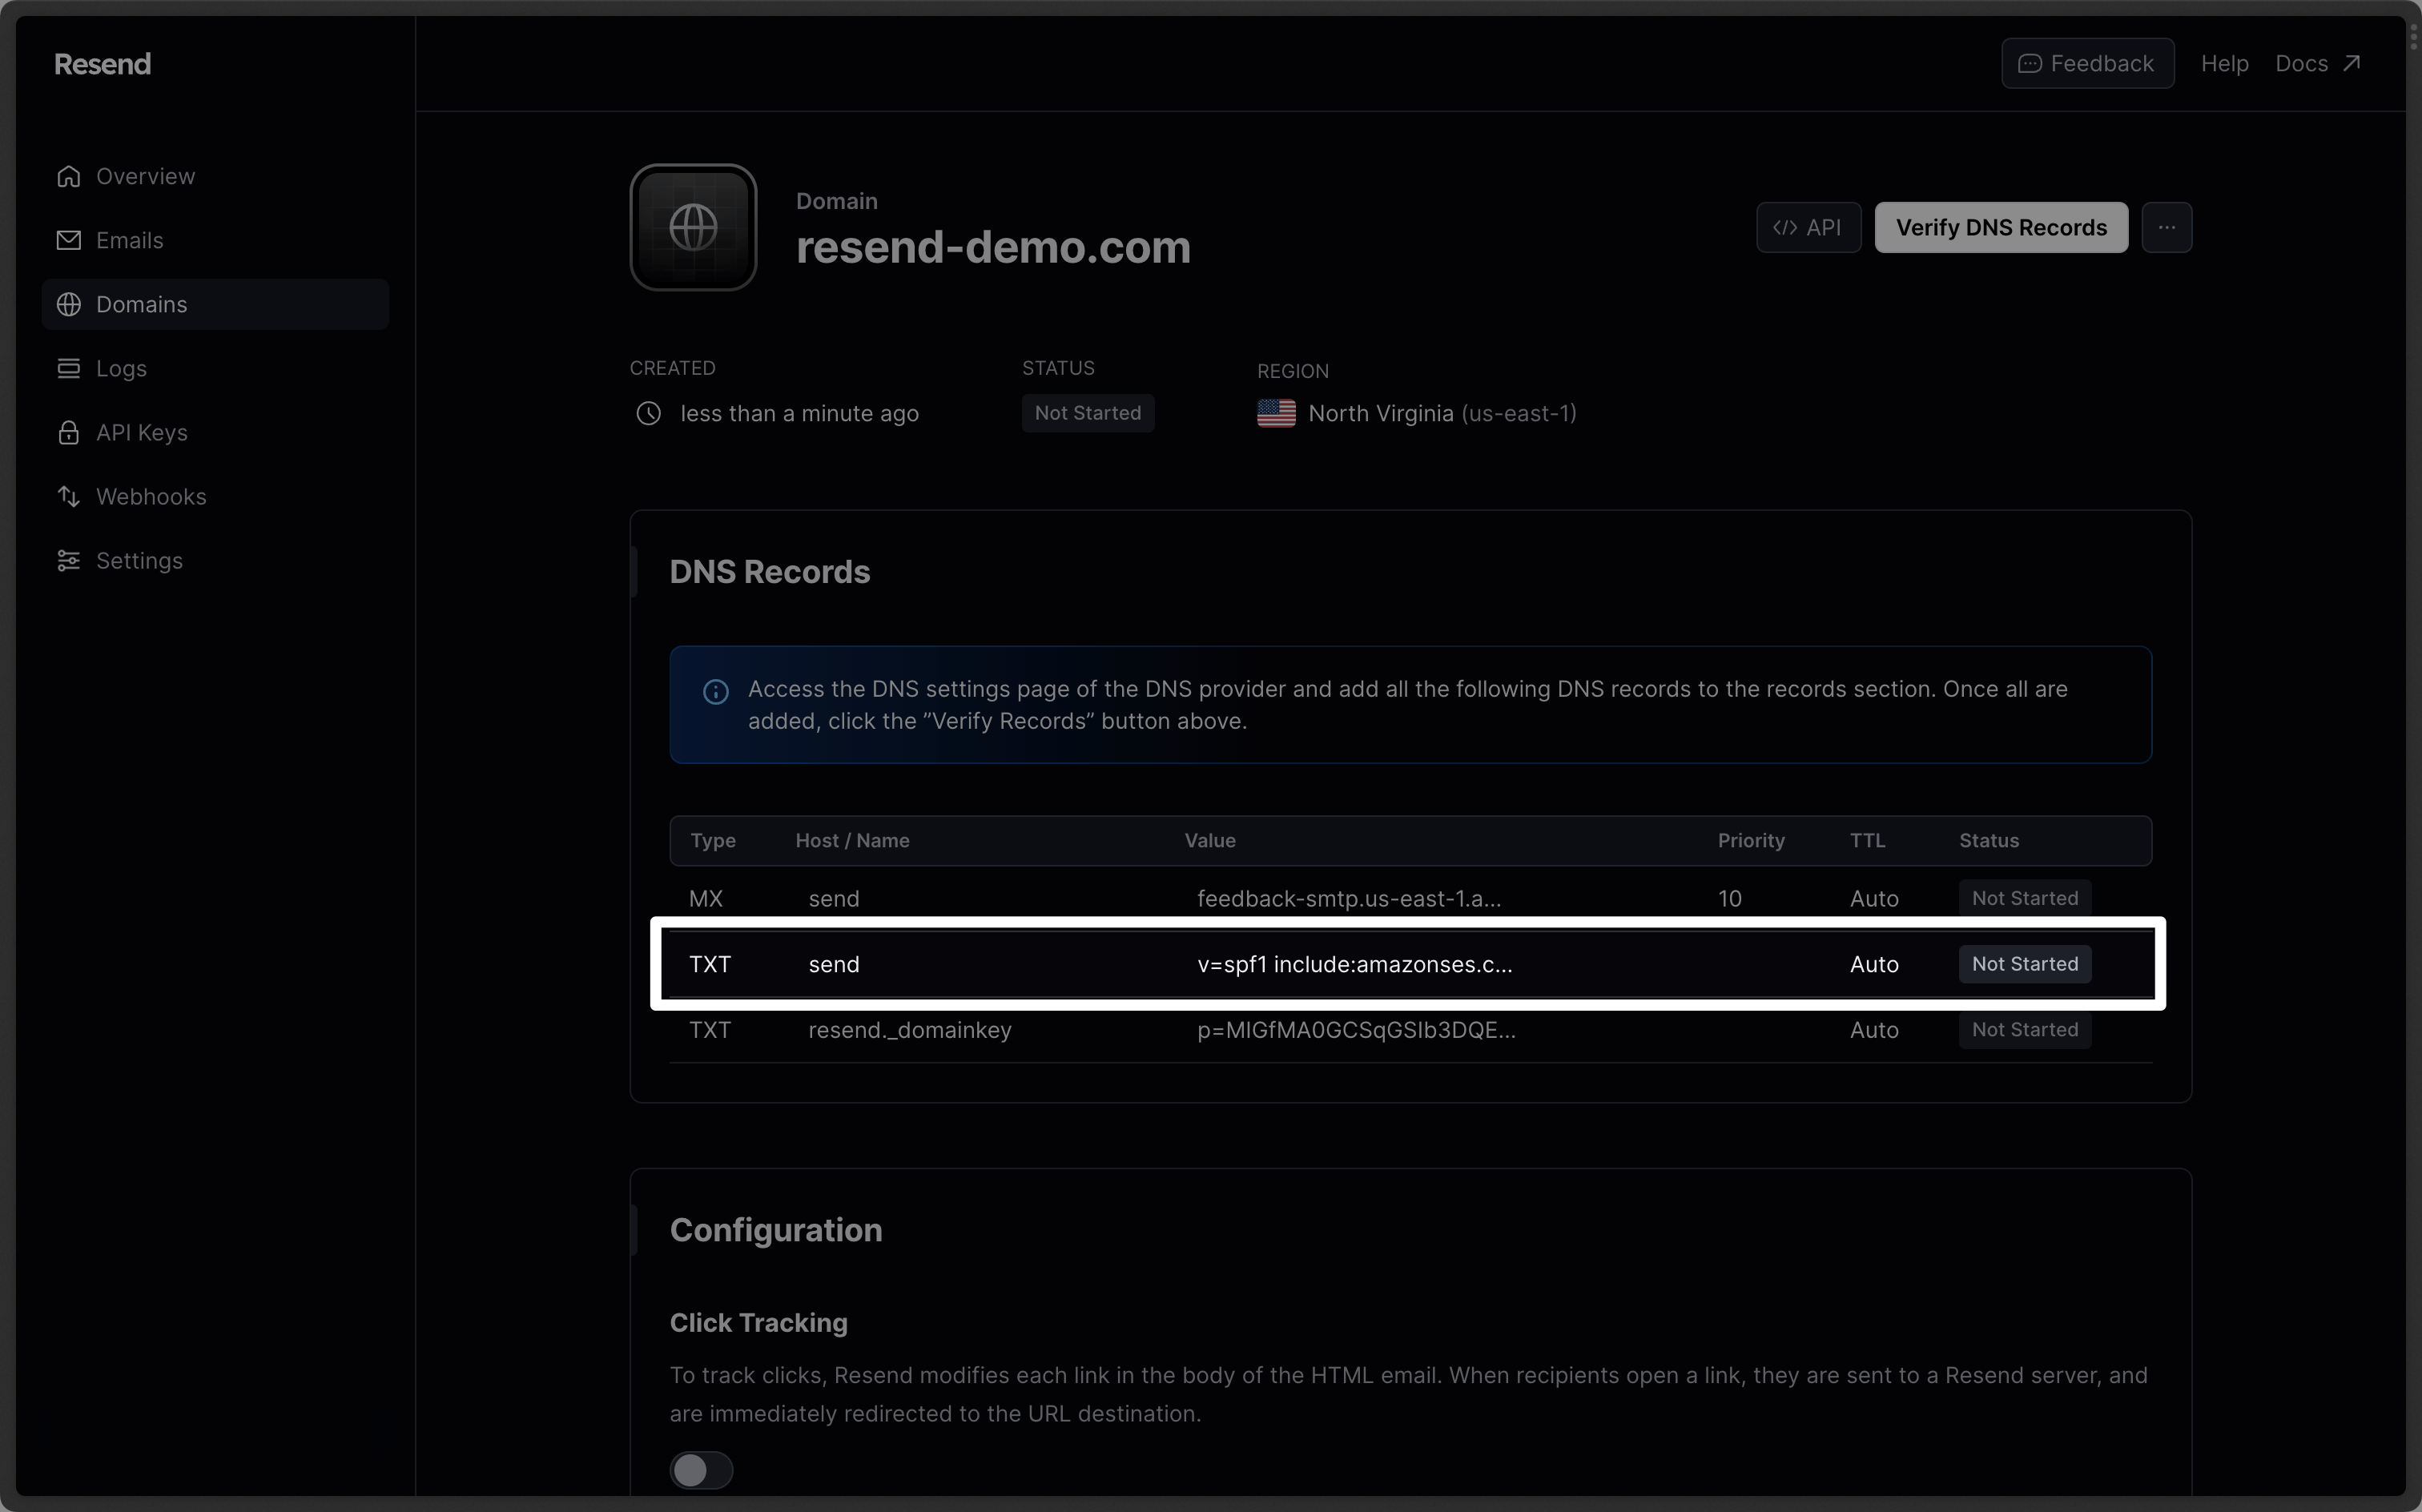
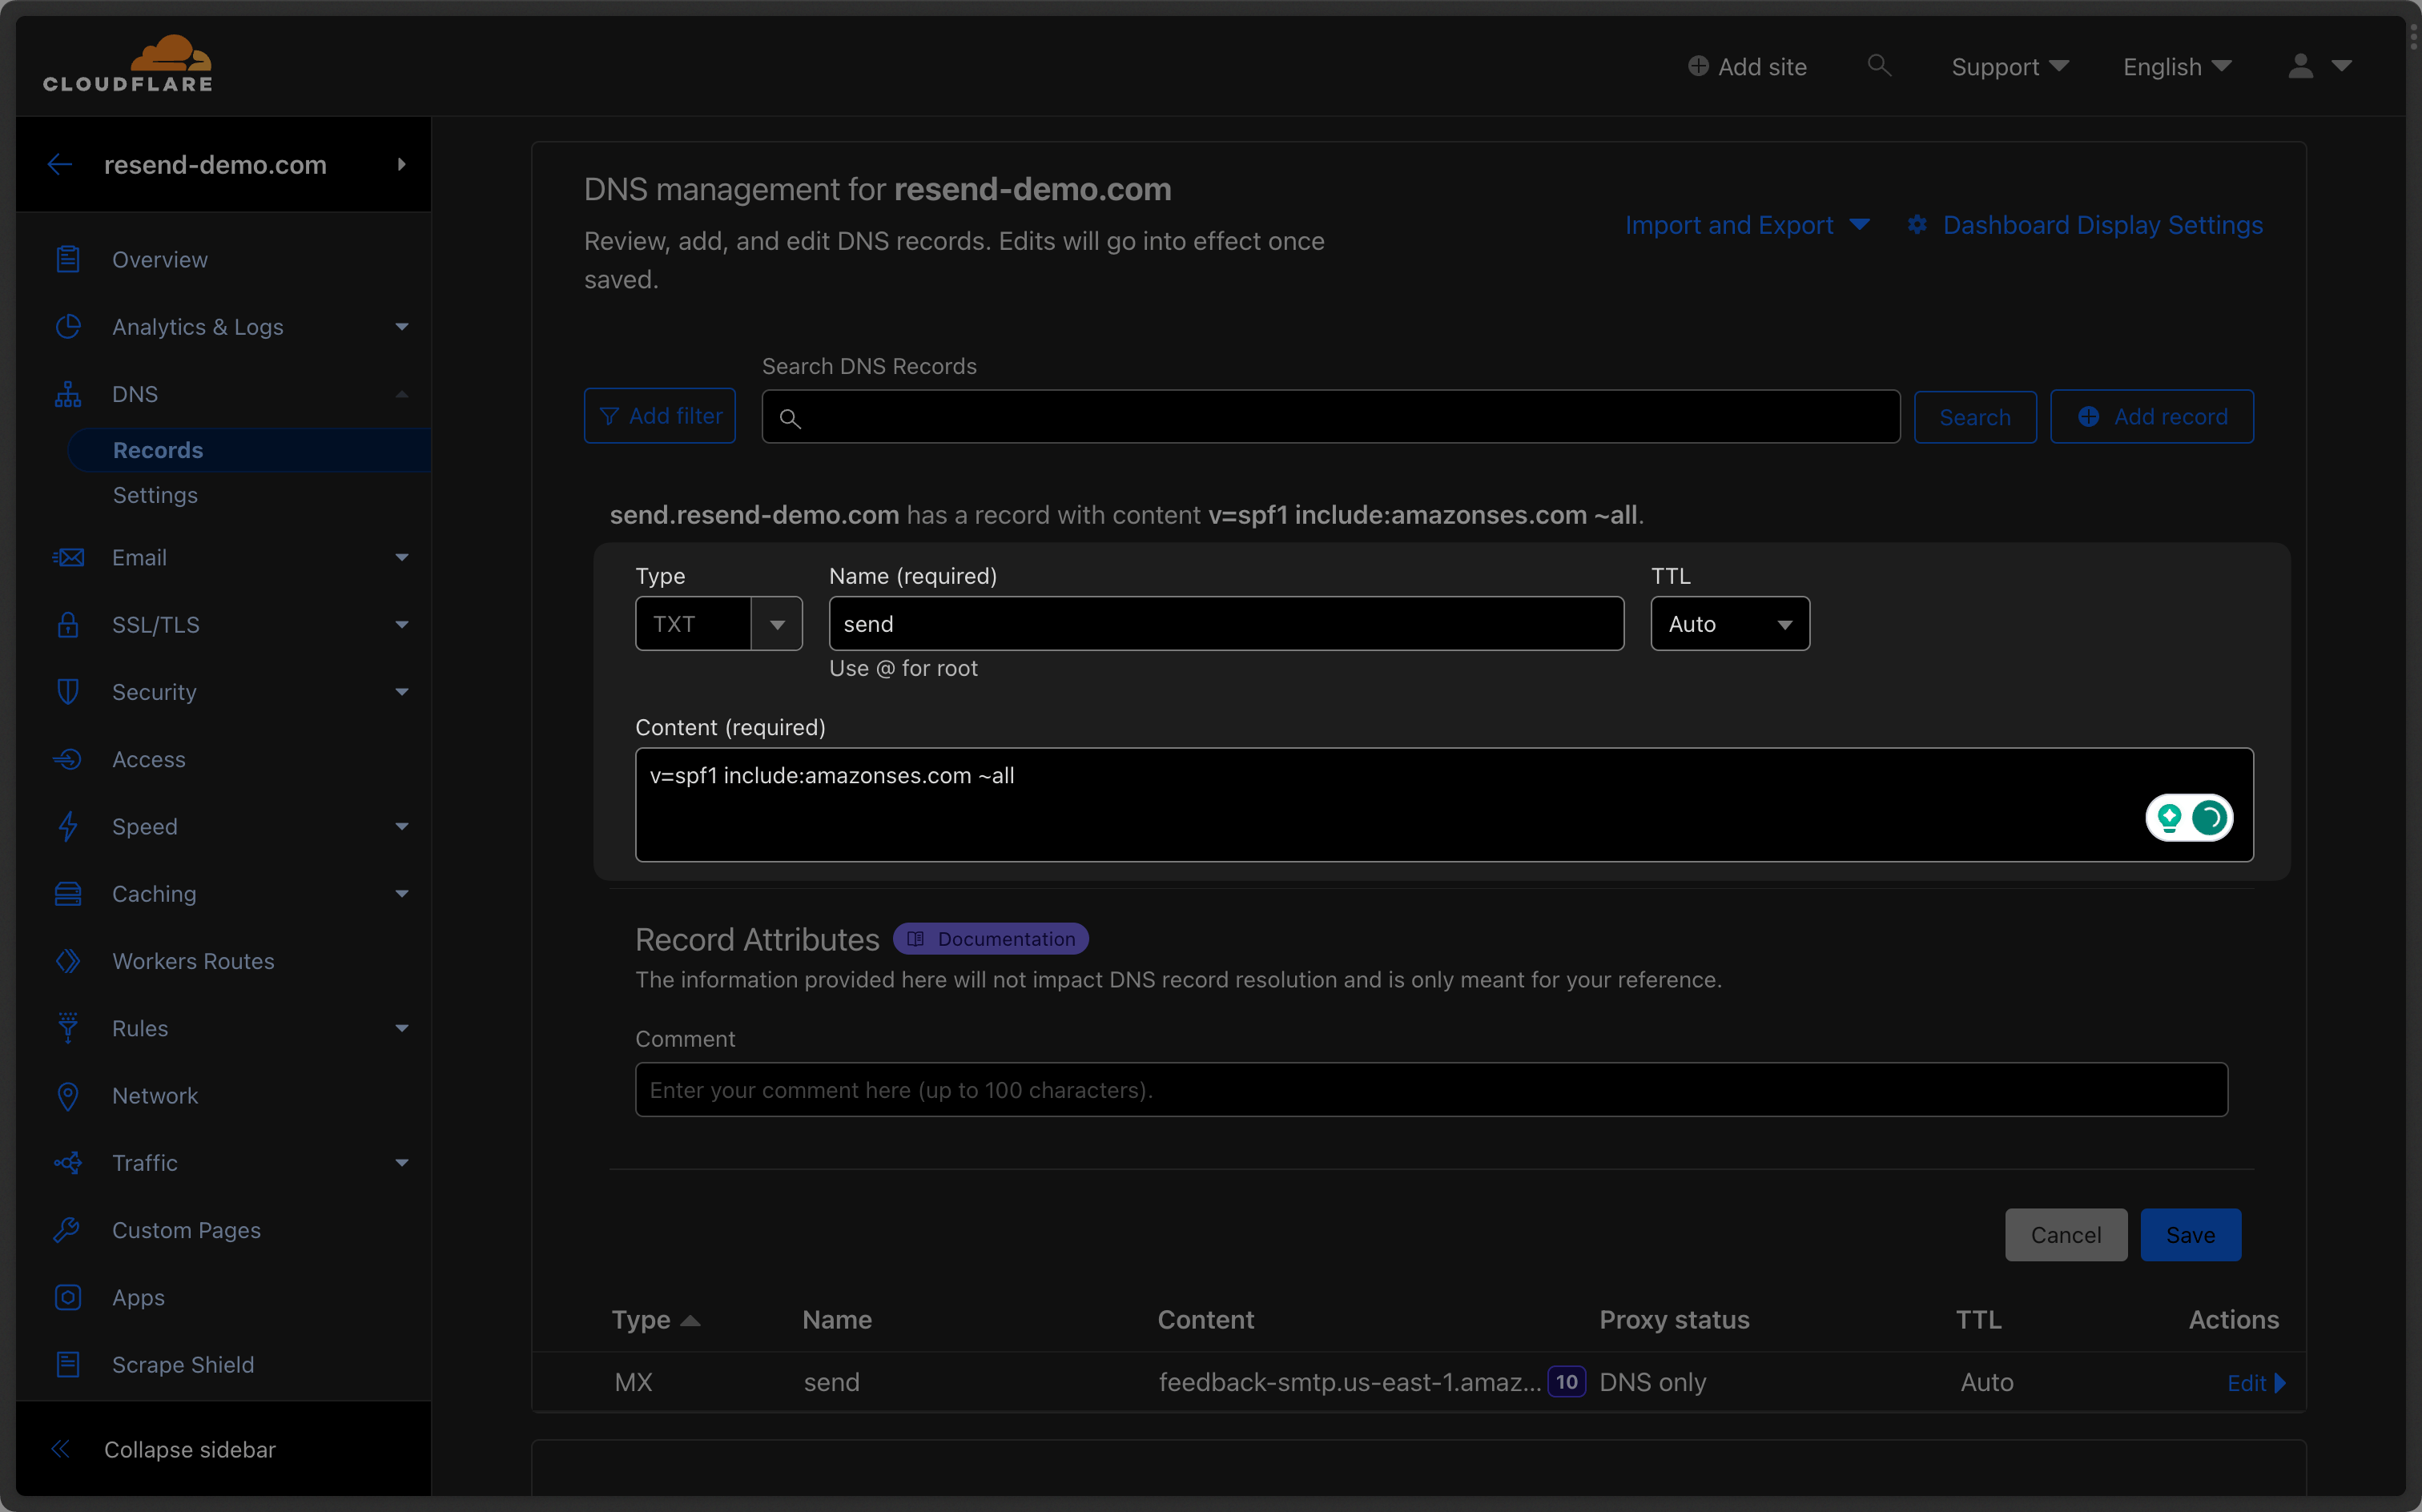
Below is a mapping of the record fields from Resend to Cloudflare:
| Cloudflare | Resend | Example Value |
|---|---|---|
| Type | Type | TXT |
| Name | Name | send |
| Content | Content | "v=spf1 include:amazonses.com ~all" |
| TTL | - | Auto |
Add TXT DKIM Records
Section titled “Add TXT DKIM Records”Click "Add Record" on Cloudflare:
- Set the Type to
TXT. - Type
resend._domainkeyfor theNameof the record. - Copy the TXT Value Resend into
Contentfield. - Use the default
AutoforTTL. - Select
Save.
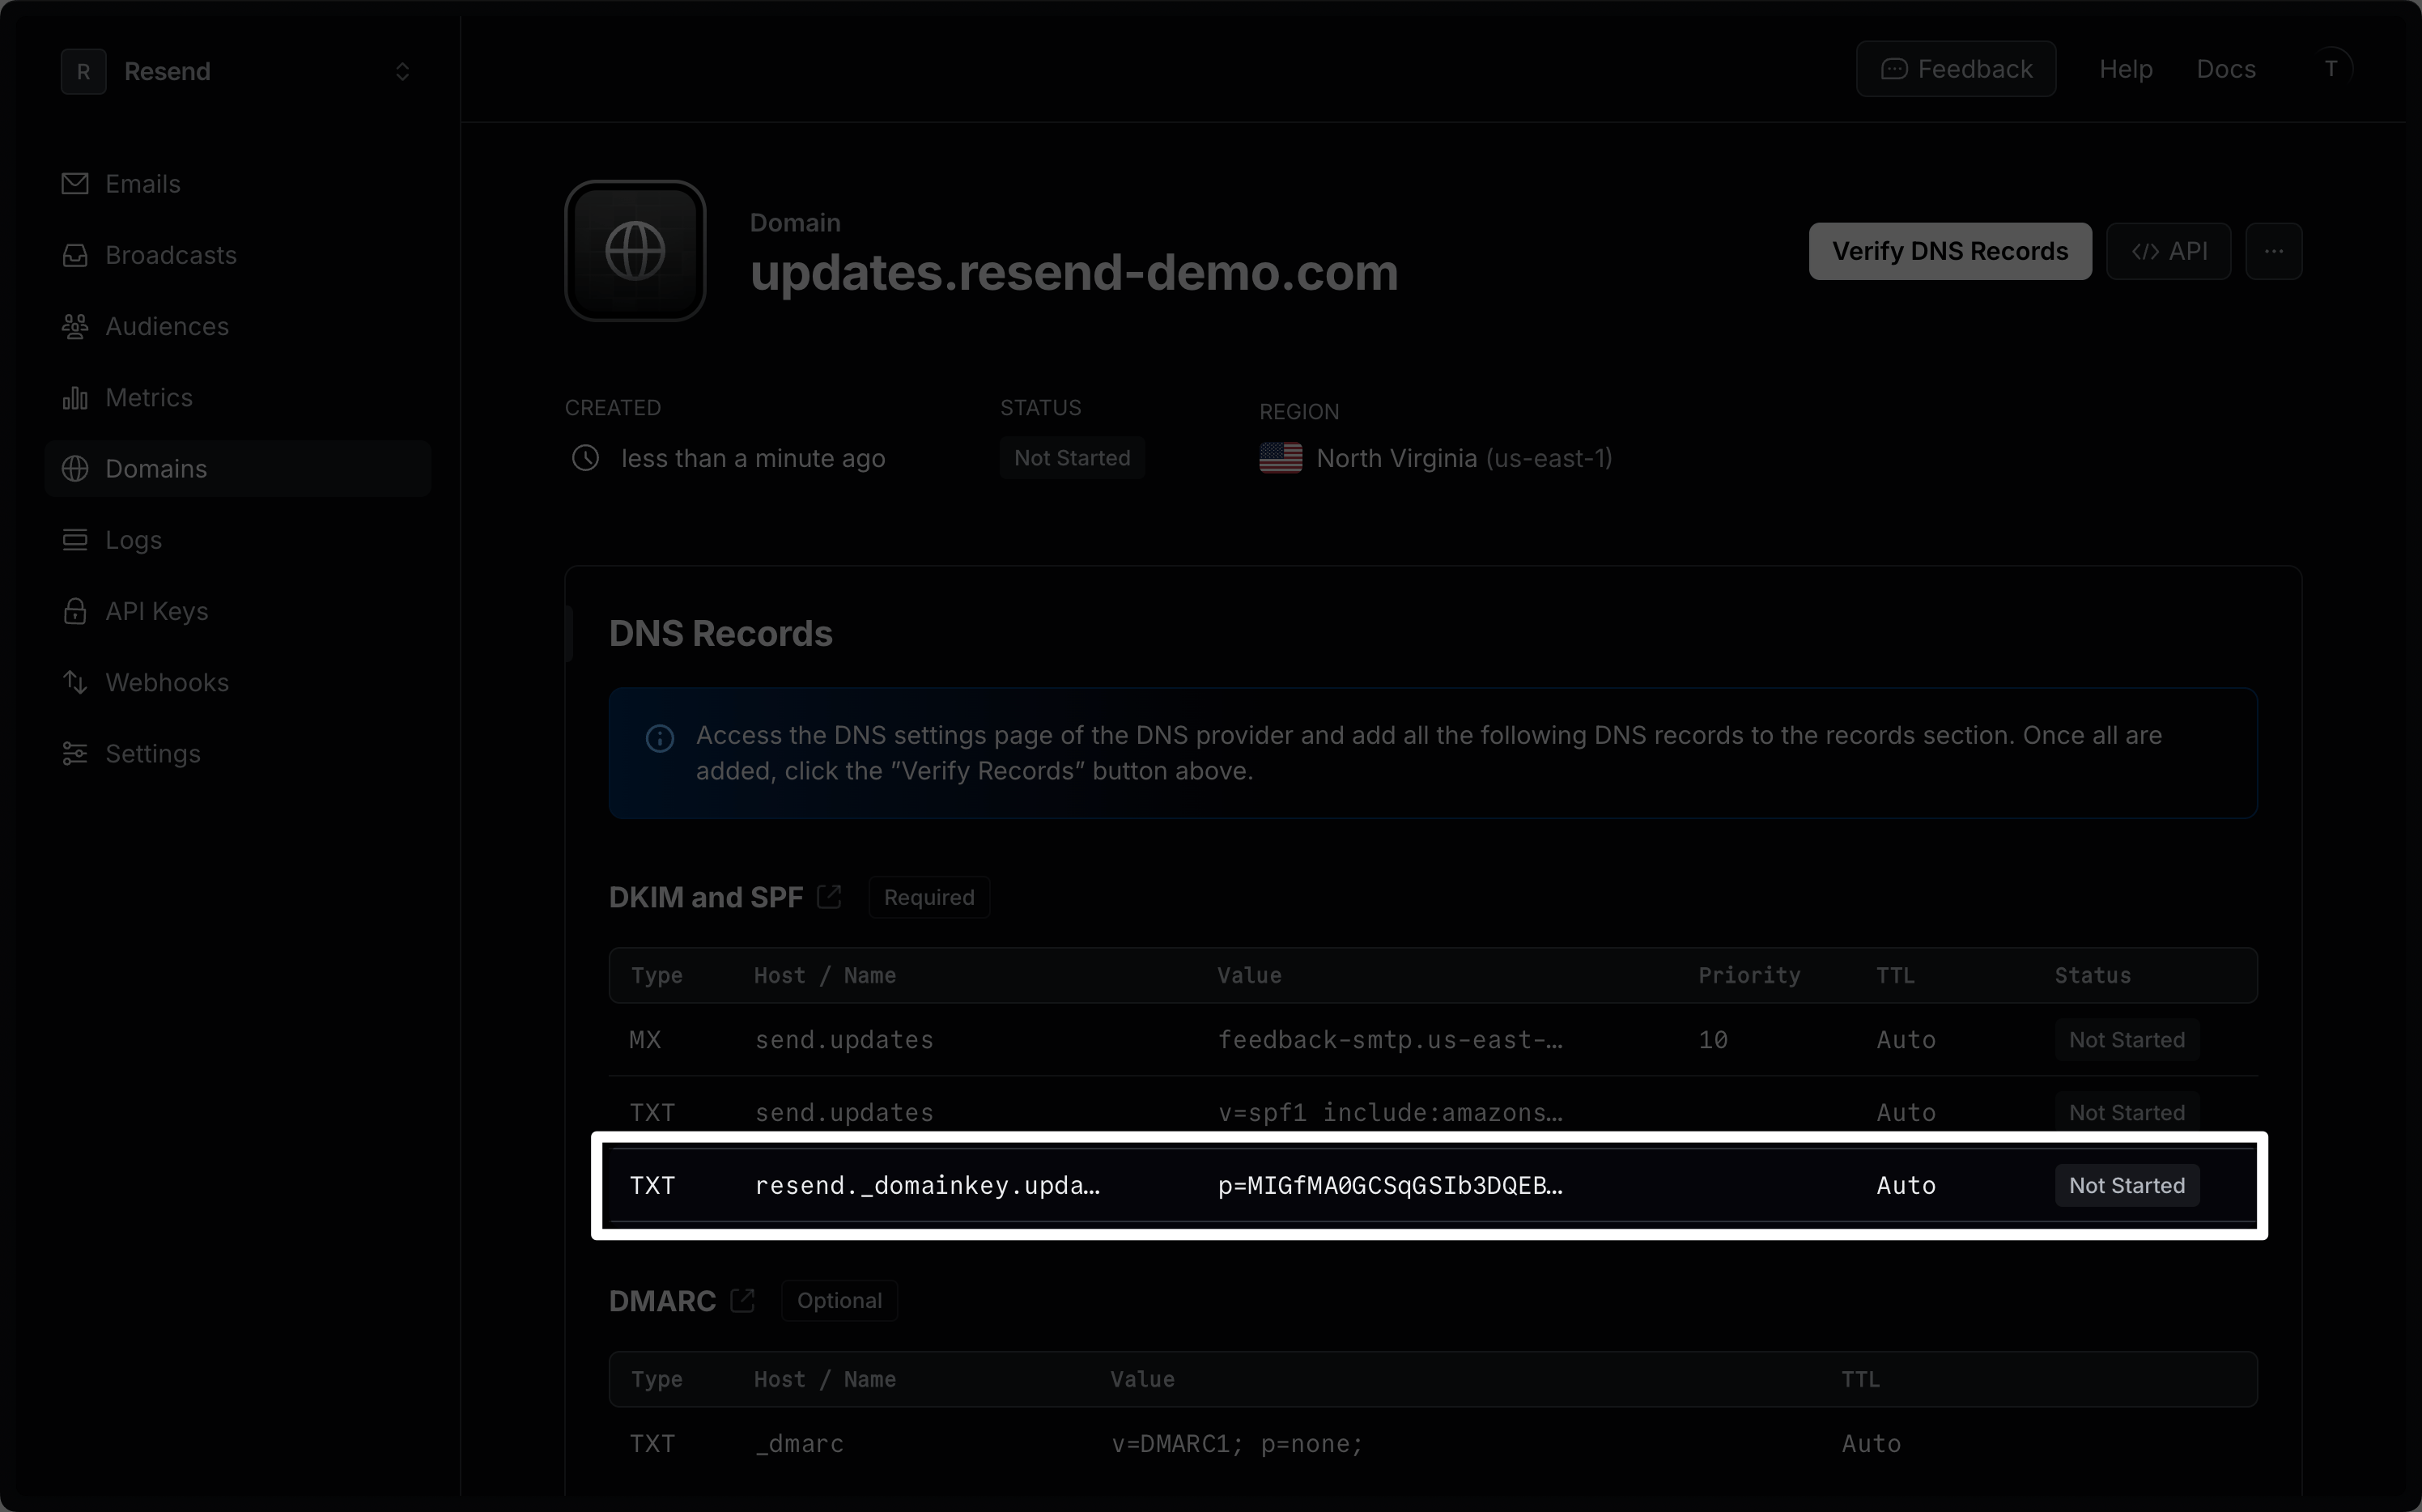
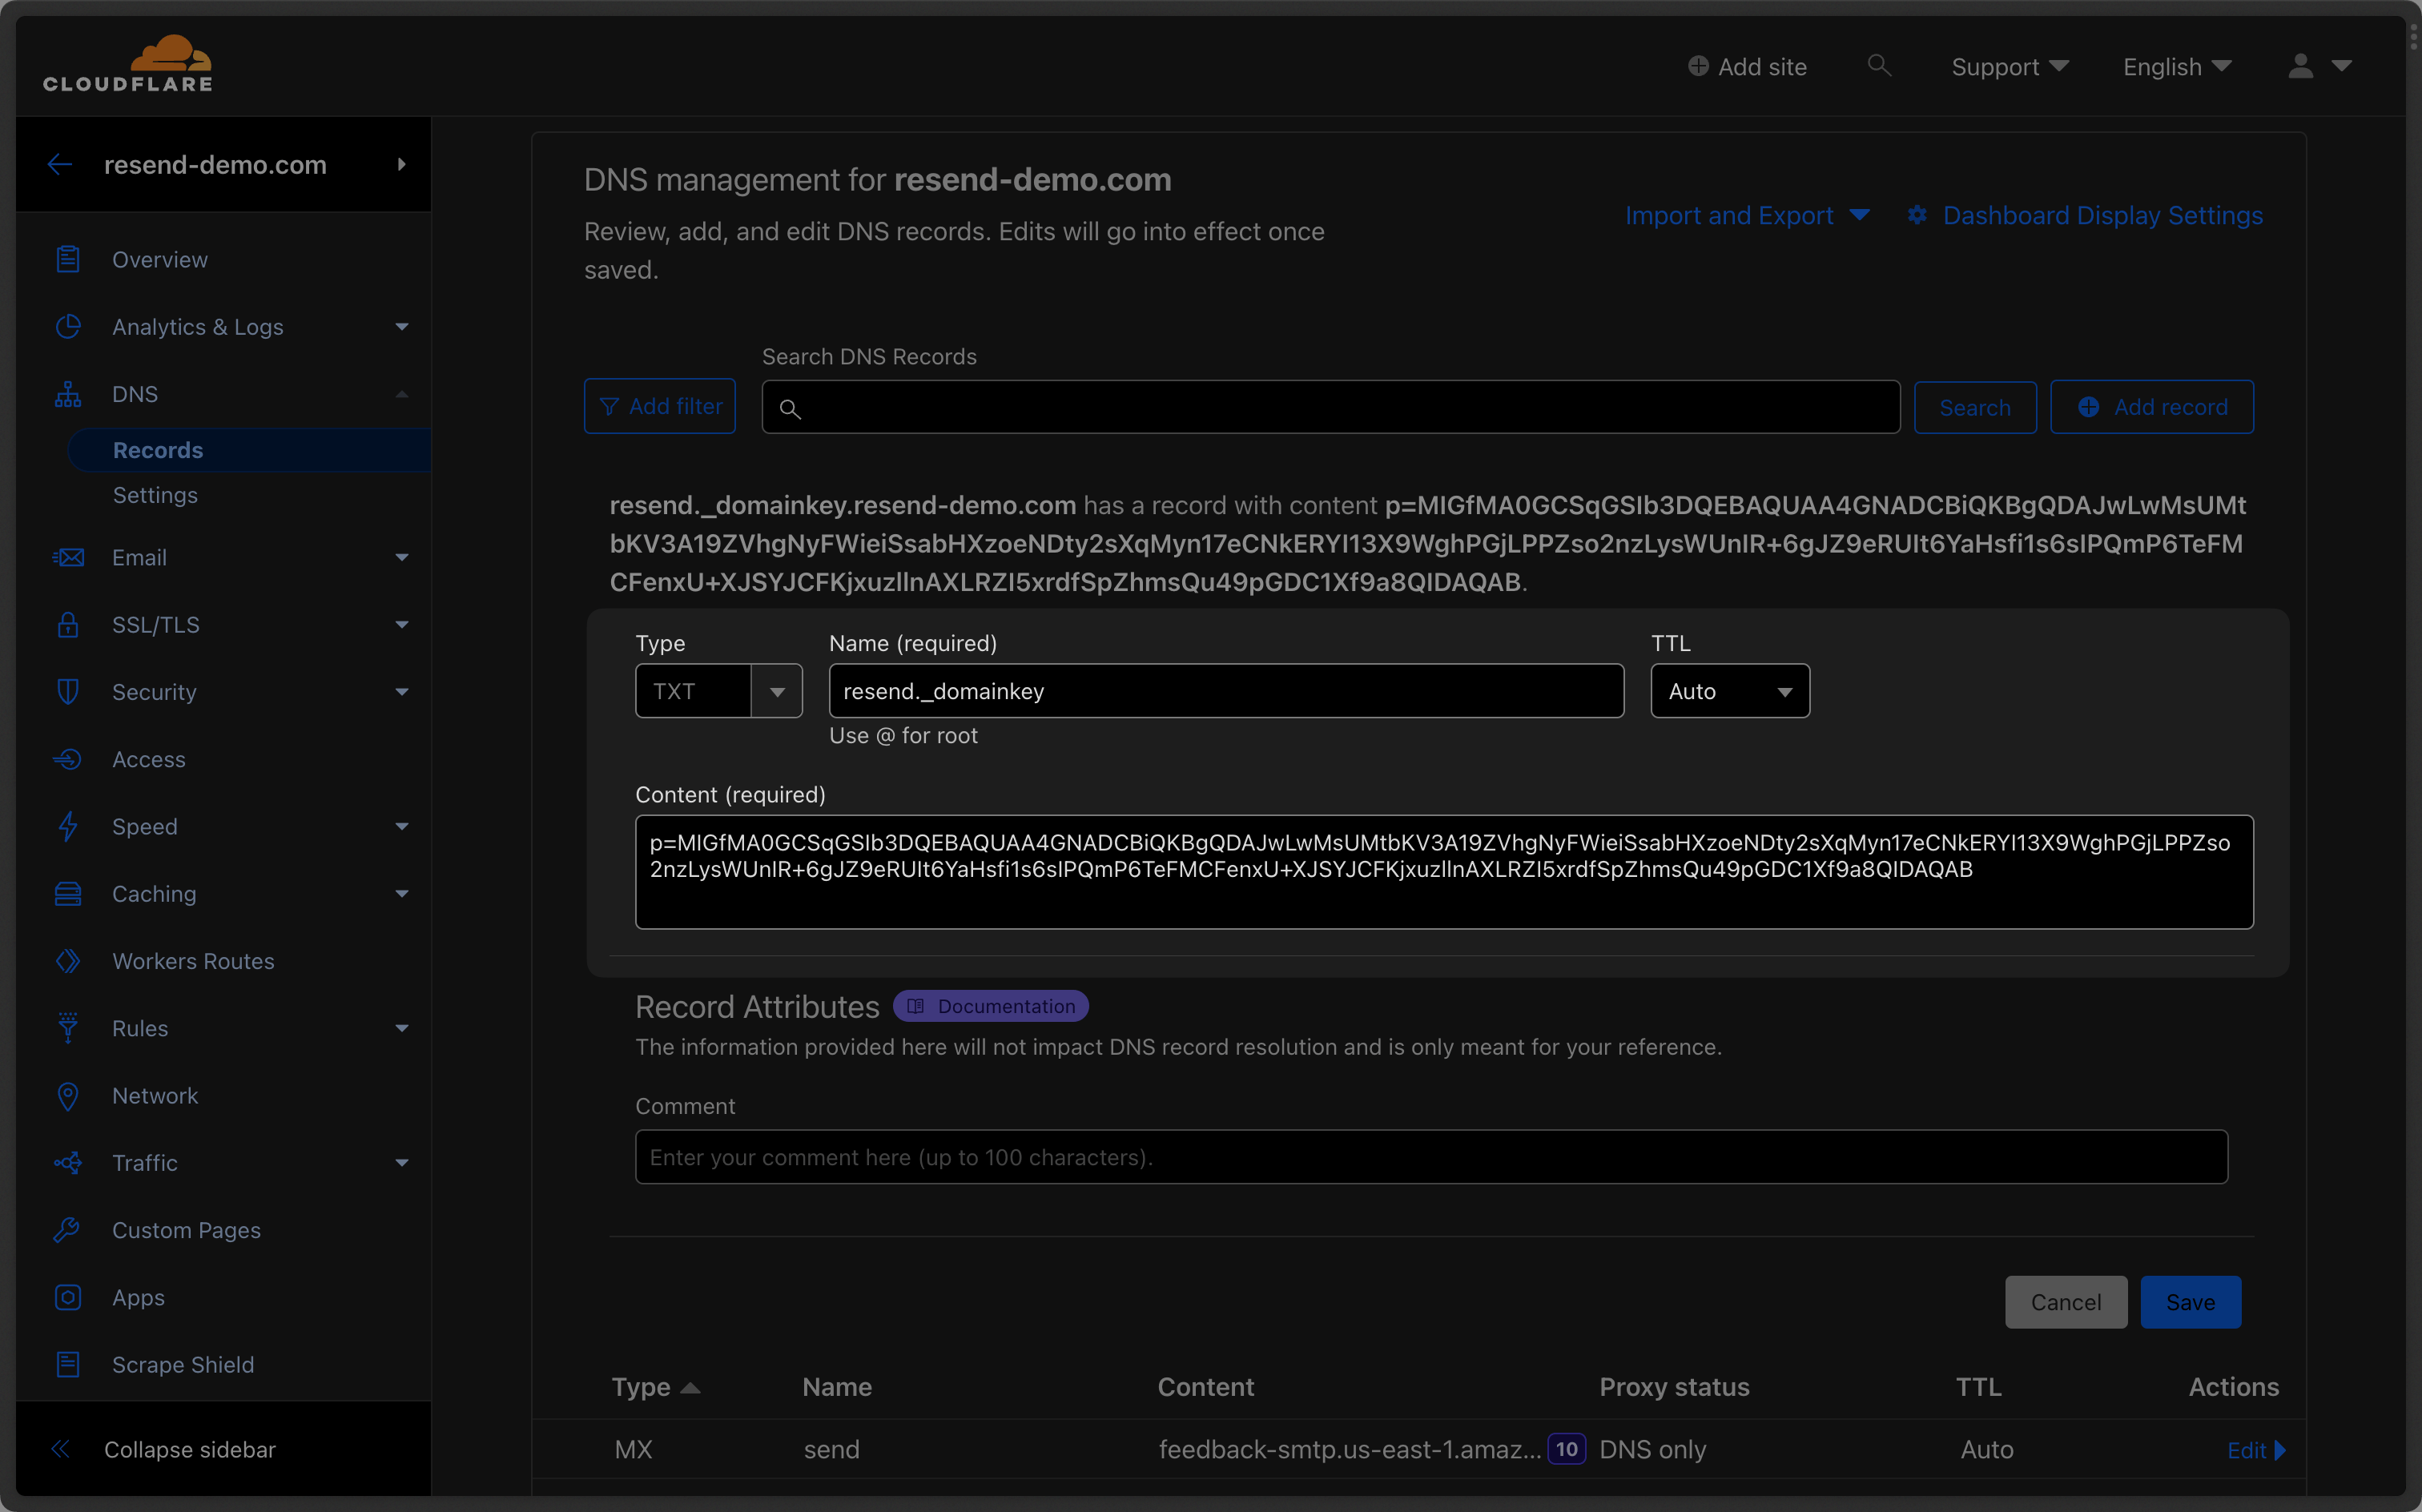
Below is a mapping of the record fields from Resend to Cloudflare:
| Cloudflare | Resend | Example Value |
|---|---|---|
| Type | Type | TXT |
| Name | Name | resend._domainkey |
| Target | Content | p=example_domain_key_value |
| Proxy Status | - | DNS Only (disabled) |
| TTL | - | Auto |
Receiving Emails
Section titled “Receiving Emails”If you want to receive emails at your domain, toggle the "Receiving" switch on the domain details page.
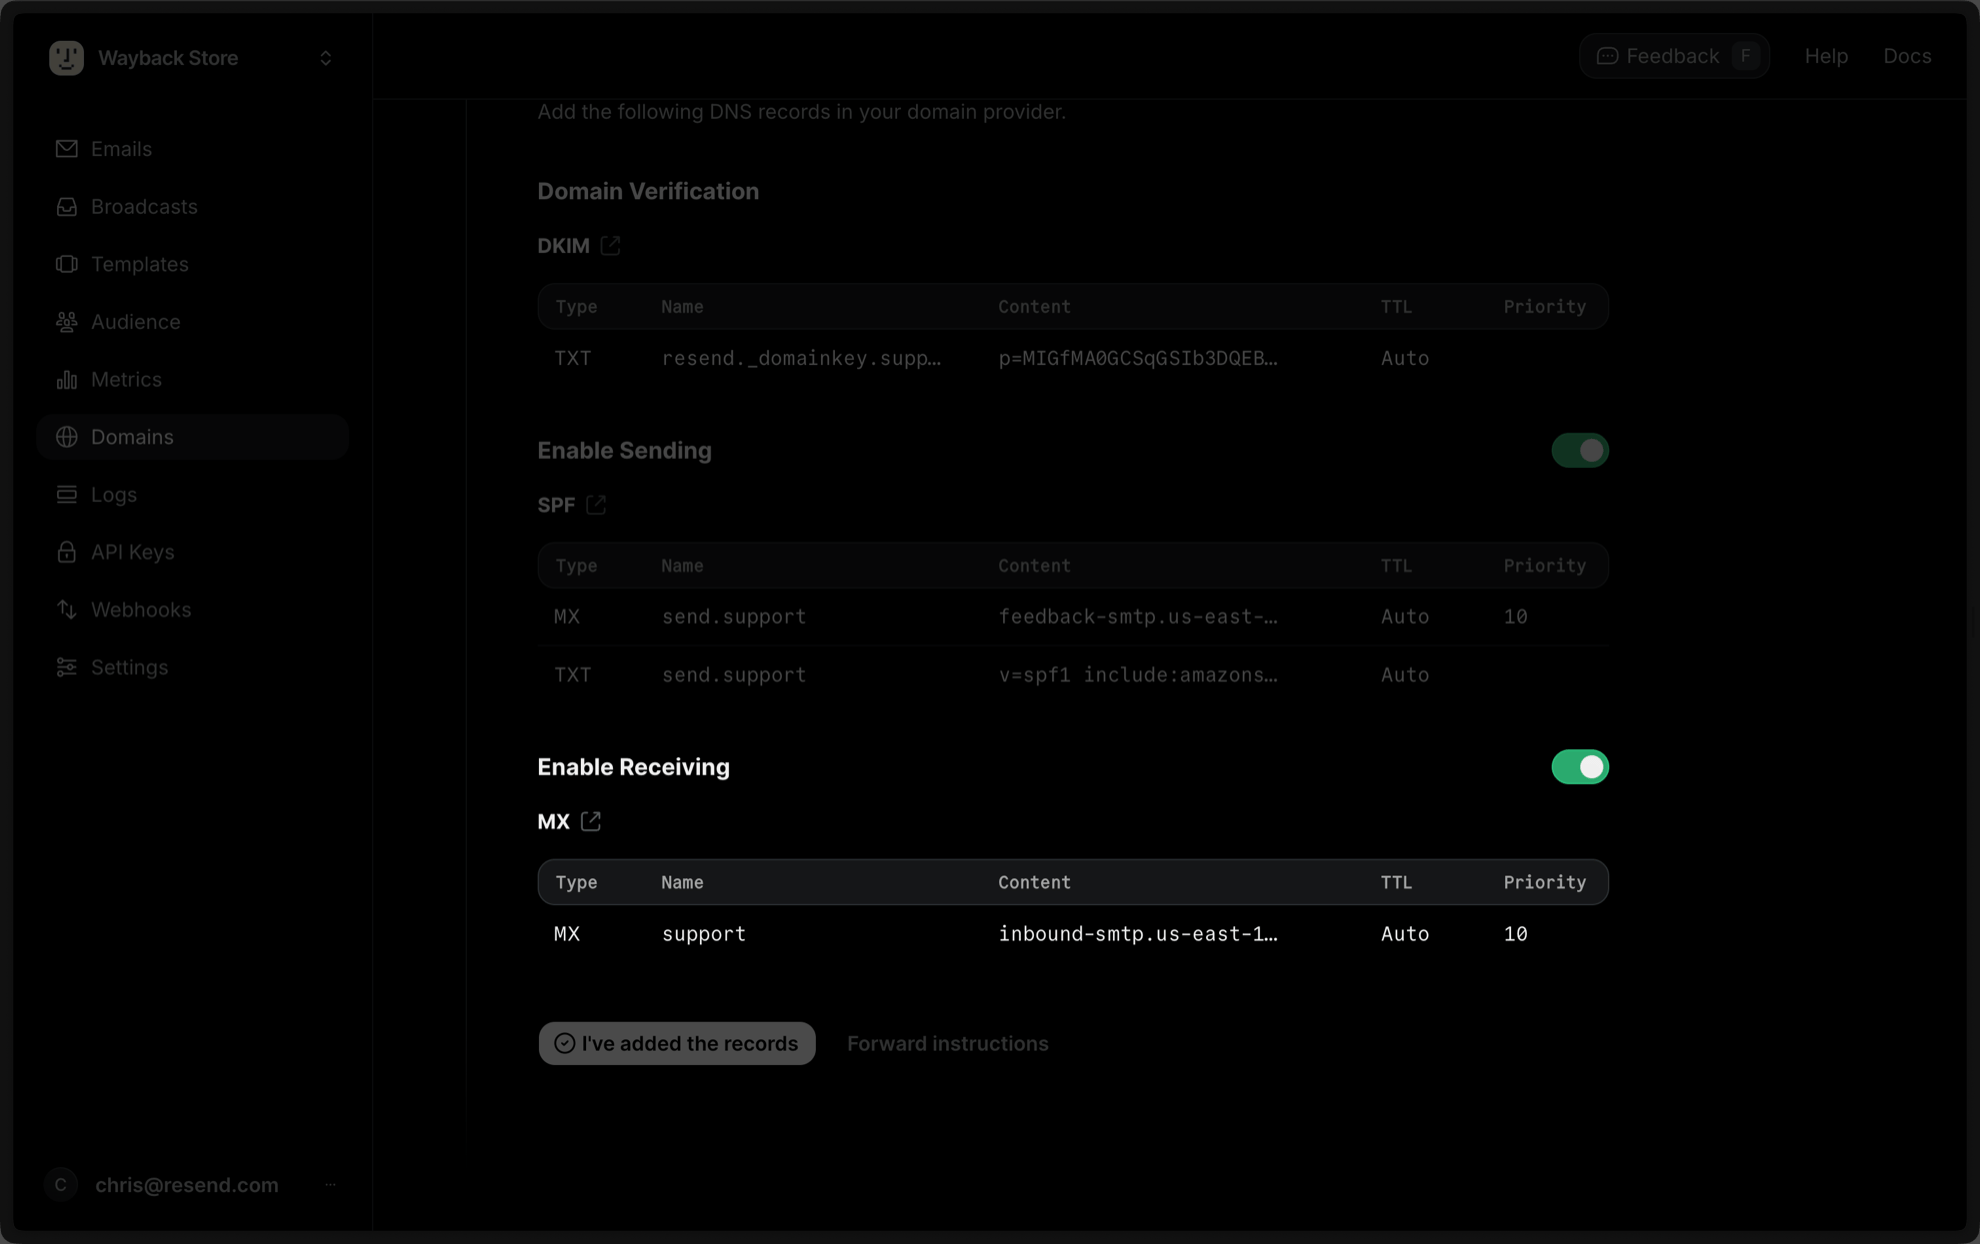
Click “Add Record” on Cloudflare:
- Set the Type to
MX. - Type
inbound(or whatever your subdomain is) for theNameof the record. - Copy the MX Value from Resend into the
Mail Serverfield. - Use the default
AutoforTTL. - Add
10for thePriority. - Select
Save.
Below is a mapping of the record fields from Resend to Cloudflare:
| Cloudflare | Resend | Example Value |
|---|---|---|
| Type | Type | MX |
| Name | Name | inbound |
| Mail Server | Content | inbound-smtp.us-east-1.amazonaws.com |
| Priority | Priority | 10 |
After verifying your domain, create a webhook to process incoming emails. For help setting up a webhook, how to access email data and attachments, forward emails, and more, see our guide on receiving emails with Resend.
Complete Verification
Section titled “Complete Verification”Now click Verify DNS Records on your Domain in Resend. It may take up to 72 hours to complete the verification process (often much faster).
Troubleshooting
Section titled “Troubleshooting”If your domain is not successfully verified, these are some common troubleshooting methods.
Cloudflare returns 'Code: 1004' when adding CNAME Records.
Confirm your proxy settings are set to DNS Only on the record you are adding.
Resend shows my domain verification failed.
Review the records you added to Cloudflare to rule out copy and paste errors.