What if my domain is not verifying?
Verifying a domain involves a few steps:
- Add your domain to Resend
- Copy the required DNS records from Resend
- Add these records to your DNS provider
- Wait for verification to complete
When this process is completed correctly, your domain will often verify within 15 minutes of adding the DNS records.
Common verification issues
Section titled “Common verification issues”When your domain doesn't verify as expected, it's typically due to DNS configuration issues. This guide will help you troubleshoot and resolve common verification problems.
Incorrect DNS records
Section titled “Incorrect DNS records”Usually when a domain doesn't verify, it's because the DNS records were not added correctly. Here's how to check:
- Confirm that you've added every record shown in your domain's Records tab
- Verify that the records are added at the correct location (the
sendsubdomain, not the root domain) - Check that record values match exactly what Resend generated for you
- Look for red wavy underlines on the domain details page (these indicate specific DNS record errors)
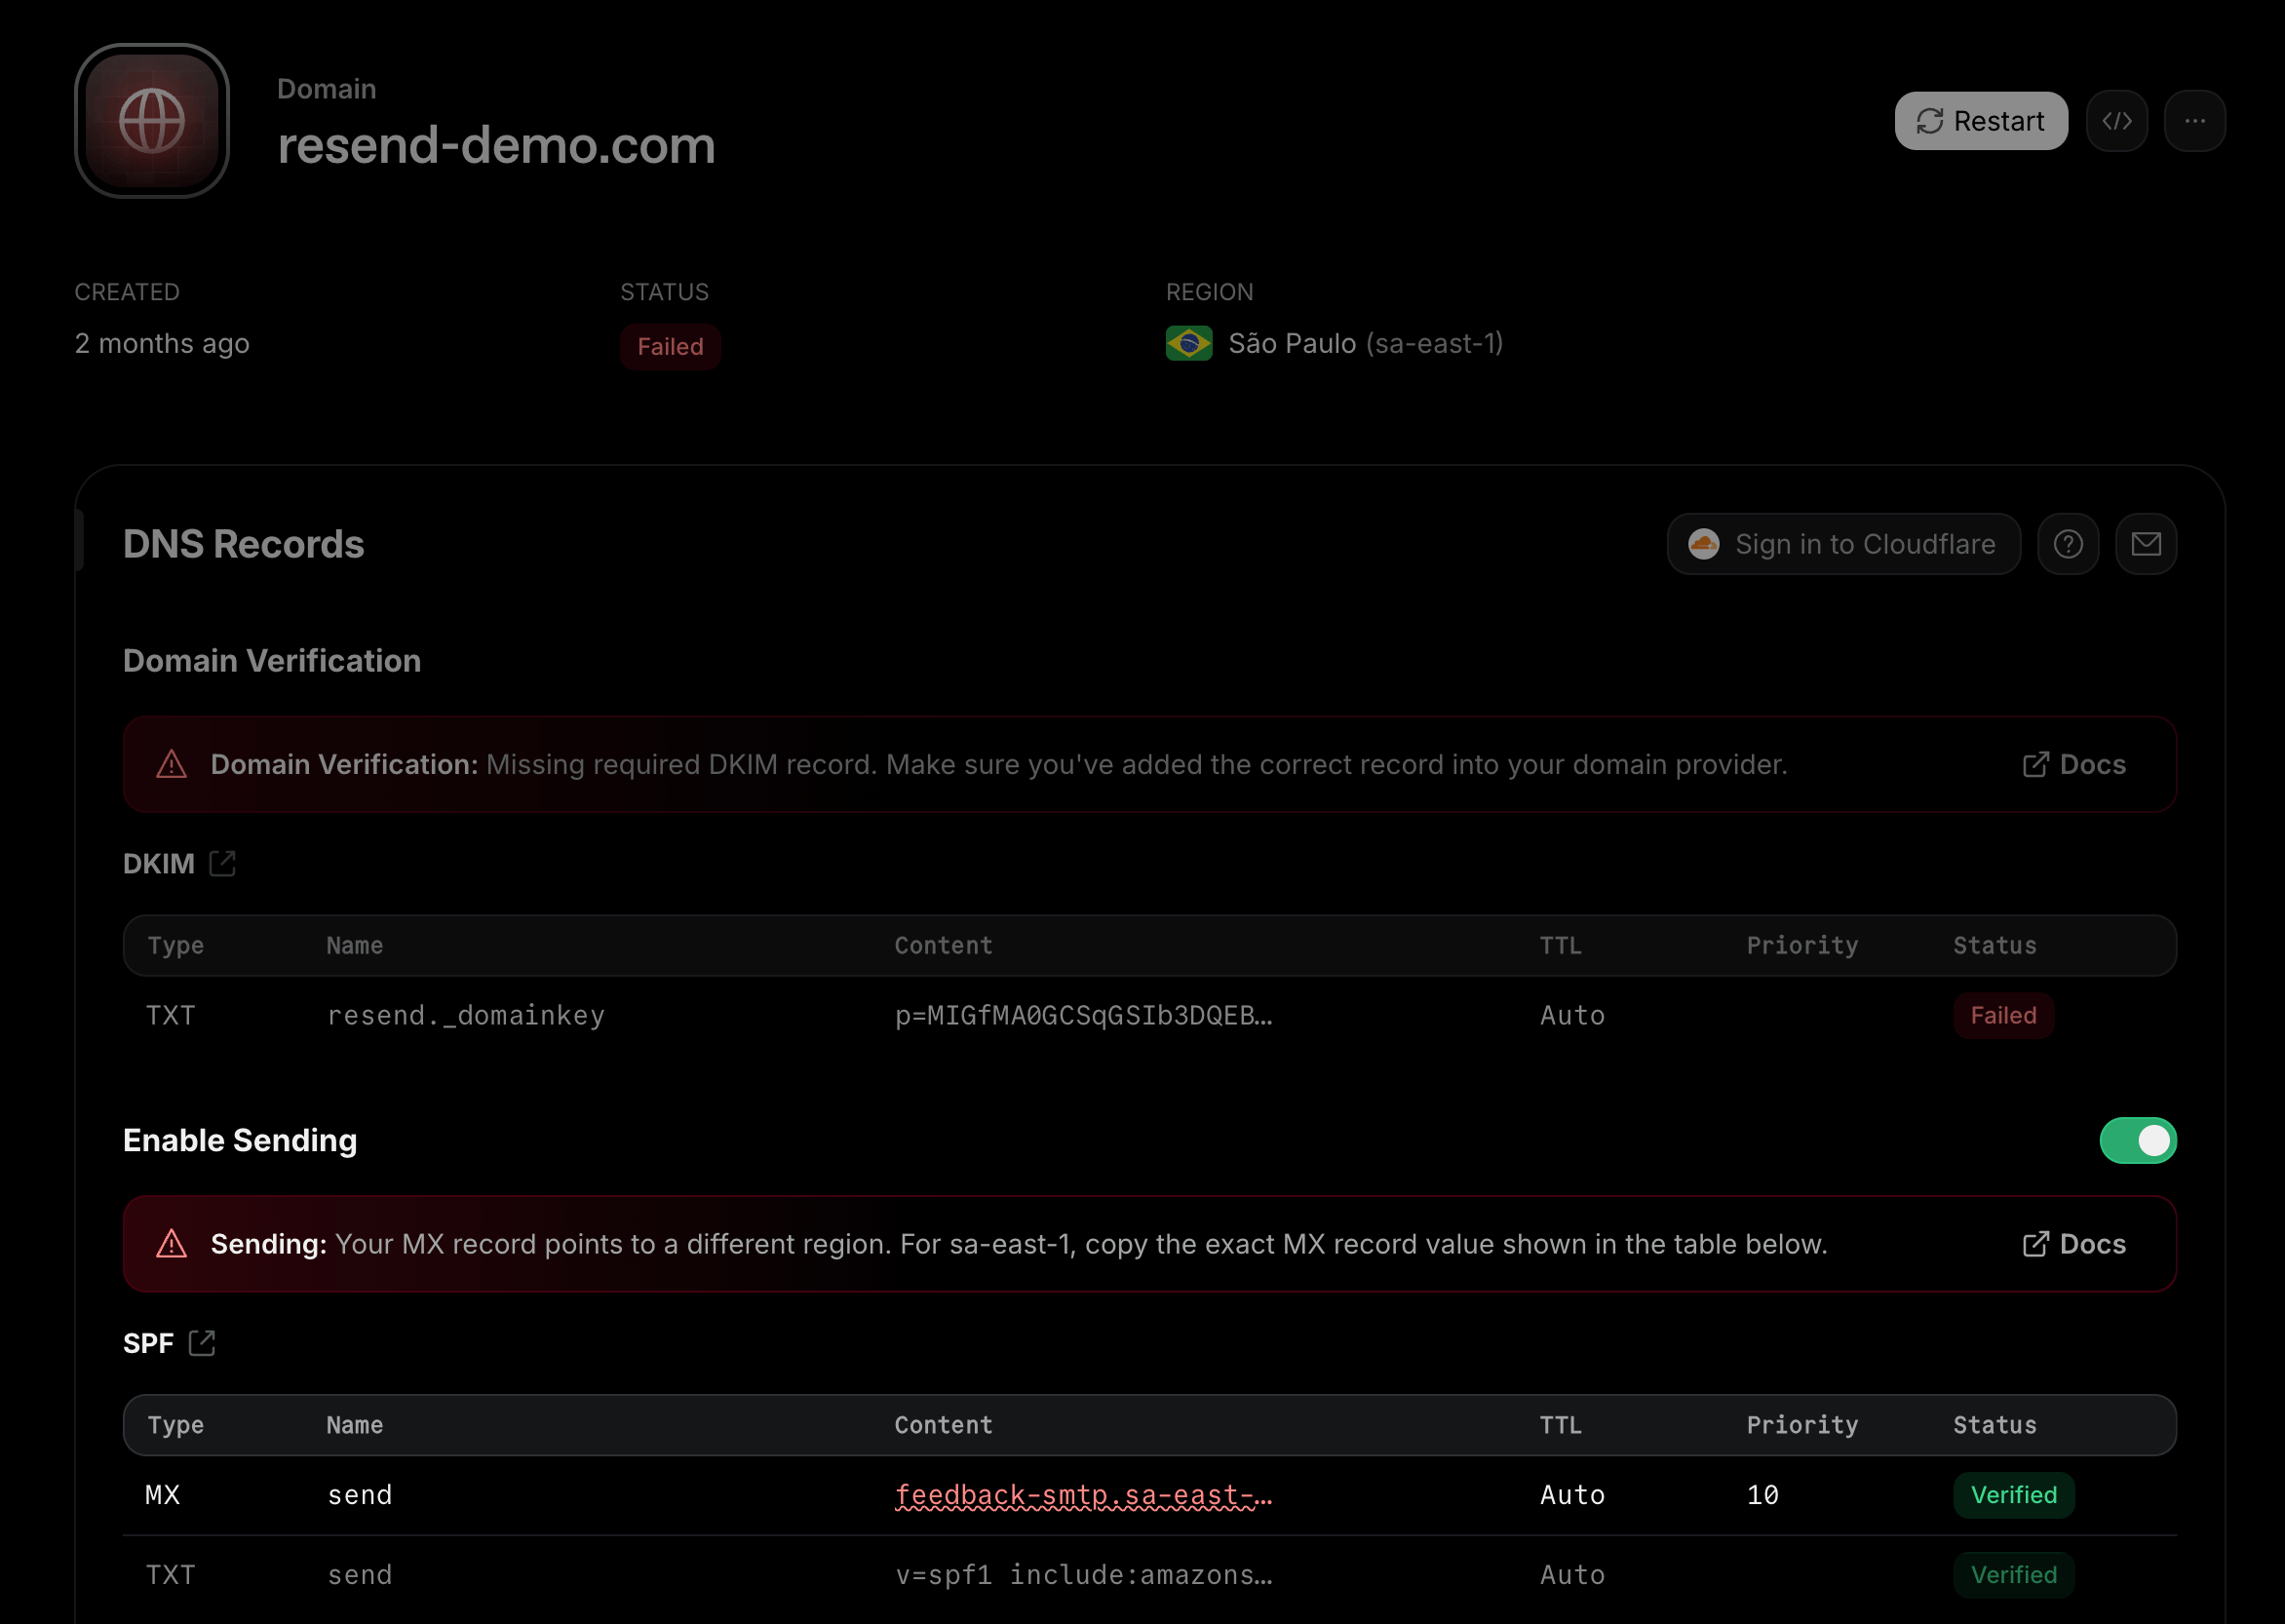
Proxied CNAME records
Section titled “Proxied CNAME records”If your domain shows CNAME records for sending, check that they're not proxied at your DNS provider. On Cloudflare, this means the cloud icon next to the record must be gray (DNS only), not orange. Proxied records don't resolve as CNAMEs, so verification never completes.
CNAME records conflicting with existing records
Section titled “CNAME records conflicting with existing records”A CNAME record can't co-exist with any other record on the same subdomain. If your DNS provider rejects the record, or verification keeps failing on a subdomain that already has an A, TXT, or MX record, you have two options:
- Remove the existing records from that subdomain
- Configure a different Return-Path subdomain (e.g.
bounce.example.com) and add the records Resend generates for it
DNS provider auto-appending domain names
Section titled “DNS provider auto-appending domain names”Some DNS providers automatically append your domain name to record MX values, causing verification failures.
Problem:
Your MX record appears as:
feedback-smtp.eu-west-1.amazonses.com.example.com
Instead of:
feedback-smtp.eu-west-1.amazonses.com
Solution:
In your DNS provider, add a trailing period (dot) at the end of the record value:
feedback-smtp.eu-west-1.amazonses.com.
The trailing period tells your DNS provider that this is a fully qualified domain name that must not be modified.
The same applies to the CNAME records shown for newer domains: if the value in your DNS provider shows the Resend host followed by your own domain name, add a trailing period to the value.
Nameserver conflicts
Section titled “Nameserver conflicts”If your domain's DNS is managed in multiple places (e.g., Vercel, Cloudflare, your domain registrar), you might be adding records in the wrong location.
How to check: Run a nameserver lookup for your domain using a tool like dns.email to see which provider actually controls your DNS. Add the Resend records at that provider, not elsewhere.
Region mismatch errors
Section titled “Region mismatch errors”If your MX records point to a different AWS region than where your domain is configured, you'll see a "region-mismatch" error. This happens when:
- Your domain is configured in one region (e.g.,
us-east-1) - But your MX record points to a different region (e.g.,
eu-west-1)
Solution: Update your MX record to match the region shown in your Resend domain configuration. The correct MX record value is displayed in the DNS records table on your domain details page.
Multiple regions detected
Section titled “Multiple regions detected”If you have multiple MX records pointing to different AWS regions, you'll see a "multiple-regions" error. All MX records for a domain must point to the same region.
Solution: Remove any MX records pointing to incorrect regions, keeping only the one that matches your domain's configured region.
DKIM record value mismatches
Section titled “DKIM record value mismatches”The DKIM record must match exactly what Resend generated. Common mistakes include:
- Adding extra quotes or spaces
- Truncating long values
- Adding SPF information to the DKIM record
- Not copying the entire value
Always copy and paste the exact value from Resend's domain configuration page. If there's a mismatch, you'll see a red wavy underline on the incorrect value.
DNS Propagation
Section titled “DNS Propagation”After adding or correcting your DNS records:
- DNS changes can take up to 72 hours to propagate globally (though often much faster)
- Use the "Restart verification" button in the Resend dashboard to trigger a fresh verification check
- If verification still fails after 24 hours, use dns.email to check if your records are visible publicly
Get more help
Section titled “Get more help”If you've followed all the steps above and your domain still isn't verifying, contact Resend support with:
- Your domain name
- Screenshots of your DNS configuration
Our team will help identify any remaining issues preventing successful verification.
Check your records in the browser
Tools like dns.email allow you to check your DNS records in the browser.
Go to this URL and replace example.com with the domain you added in Resend.
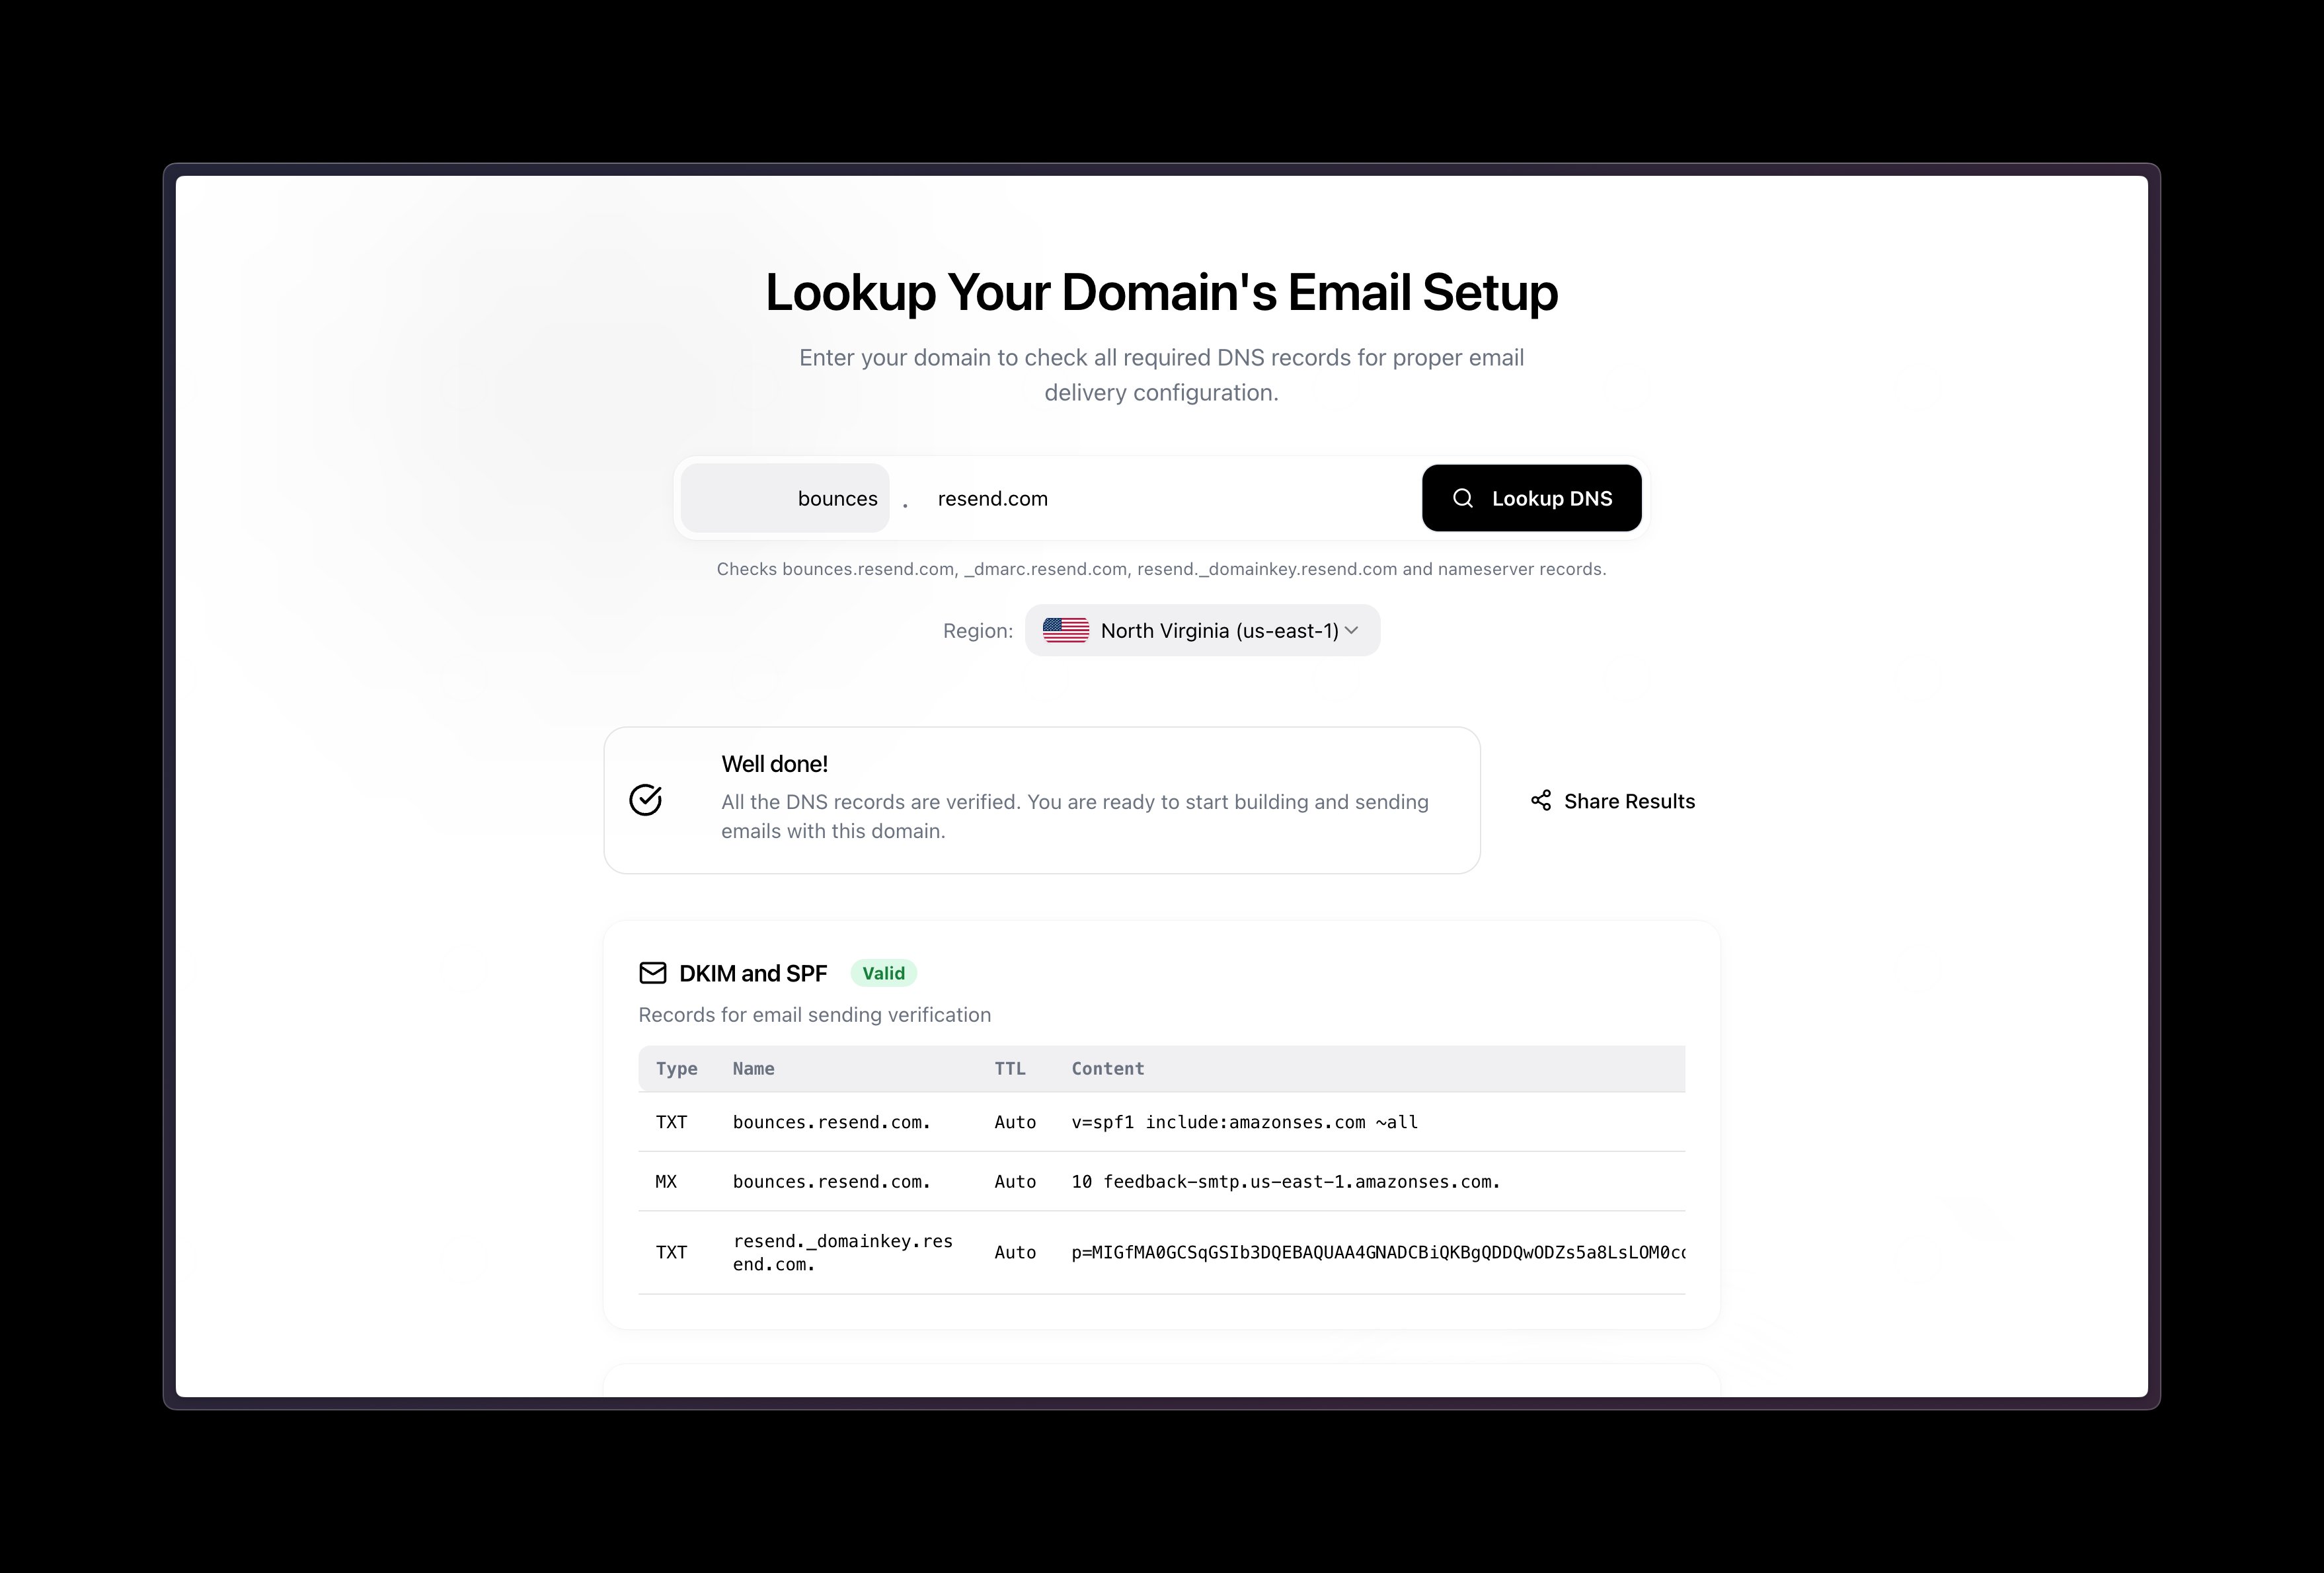
You are looking to see the same values that you see in Resend.
Check your records in the terminal
Checking your DNS records in the terminal is just as easy. You can use the nslookup command and a record type flag to get the same information.
Replace example.com with whatever you added as the domain in Resend:
Check your DKIM TXT record:
nslookup -type=TXT resend._domainkey.example.comCheck your SPF TXT record:
nslookup -type=TXT send.example.comCheck your SPF MX record:
nslookup -type=MX send.example.comIf your domain shows CNAME records for sending instead, check each of the shown CNAME records by name, as shown below:
# If your domain shows two CNAME records, check both
# Otherwise, only check the one that is shown in the Resend dashboard
nslookup -type=CNAME send.example.com
nslookup -type=CNAME rsend.example.com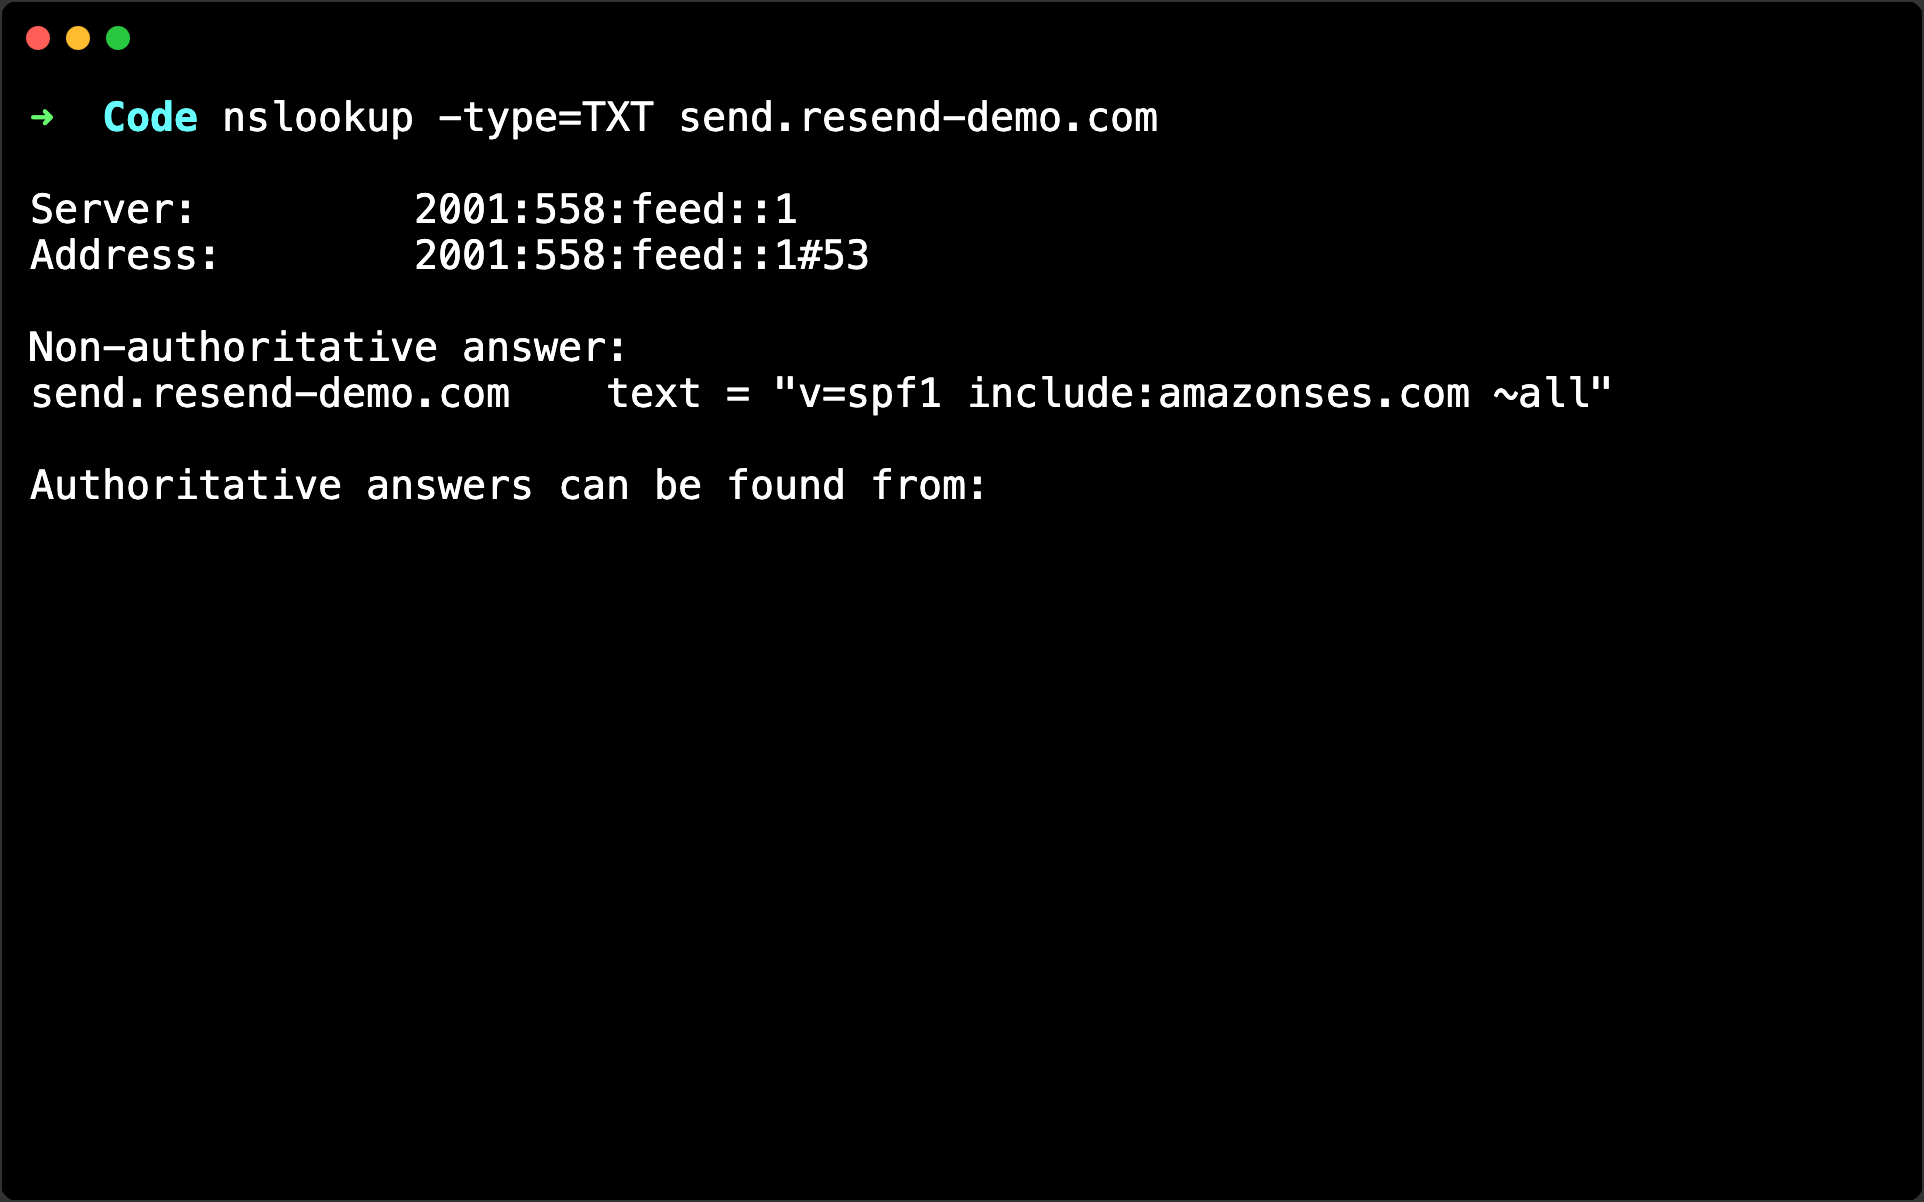
You are looking to see the same values that you see in Resend.