Create a Template
Creating Templates
Section titled “Creating Templates”You can draft and publish reusable email Templates with Resend's no-code editor or programmatically.
Templates allow you to send your frequently used transactional emails without needing to include the entire HTML body content. You can also include Template variables that will be replaced with personalized information when sending, such as a customer's first name.
You can create a new transactional email Template in several ways:
A new Template must be published before it can be used to send emails.
Add a Template in the Dashboard
Section titled “Add a Template in the Dashboard”To create and publish a new Template using the no-code editor:
Go to the Templates page in your Resend dashboard.
Click Create template.
Add sender info.
Choose any username at your verified domain to send your email from.
We suggest you choose a
fromname and address that assures the reader the email is coming from you, for example:My Company Name <company@email.example.com>
Create a subject for your email.
Optionally define other email fields.
Resend's no-code Template editor allows you to specify optional fields such as a different Reply-to address or preview text for email clients.
Write your email content.
You can use
/commands in the Template editor for UI elements such as headings, lists, and images. You can also compose your body text in Markdown and add Template variables to personalize content.Alternatively, you can paste or drag in content from an existing HTML or React Email file.
Use the sidebar to add custom styles.
When you select an element such as text, images, or the entire page, you will see contextual styling menu options in the page sidebar. Choose colors, sizes, layouts, and more in the sidebar or add your own global CSS styles directly in the editor.
Send yourself a test email.
Click
Test emailand add one or more email addresses to send a test email. You will see any Template variables and can update their default values before sending.Publish your Template.
Click
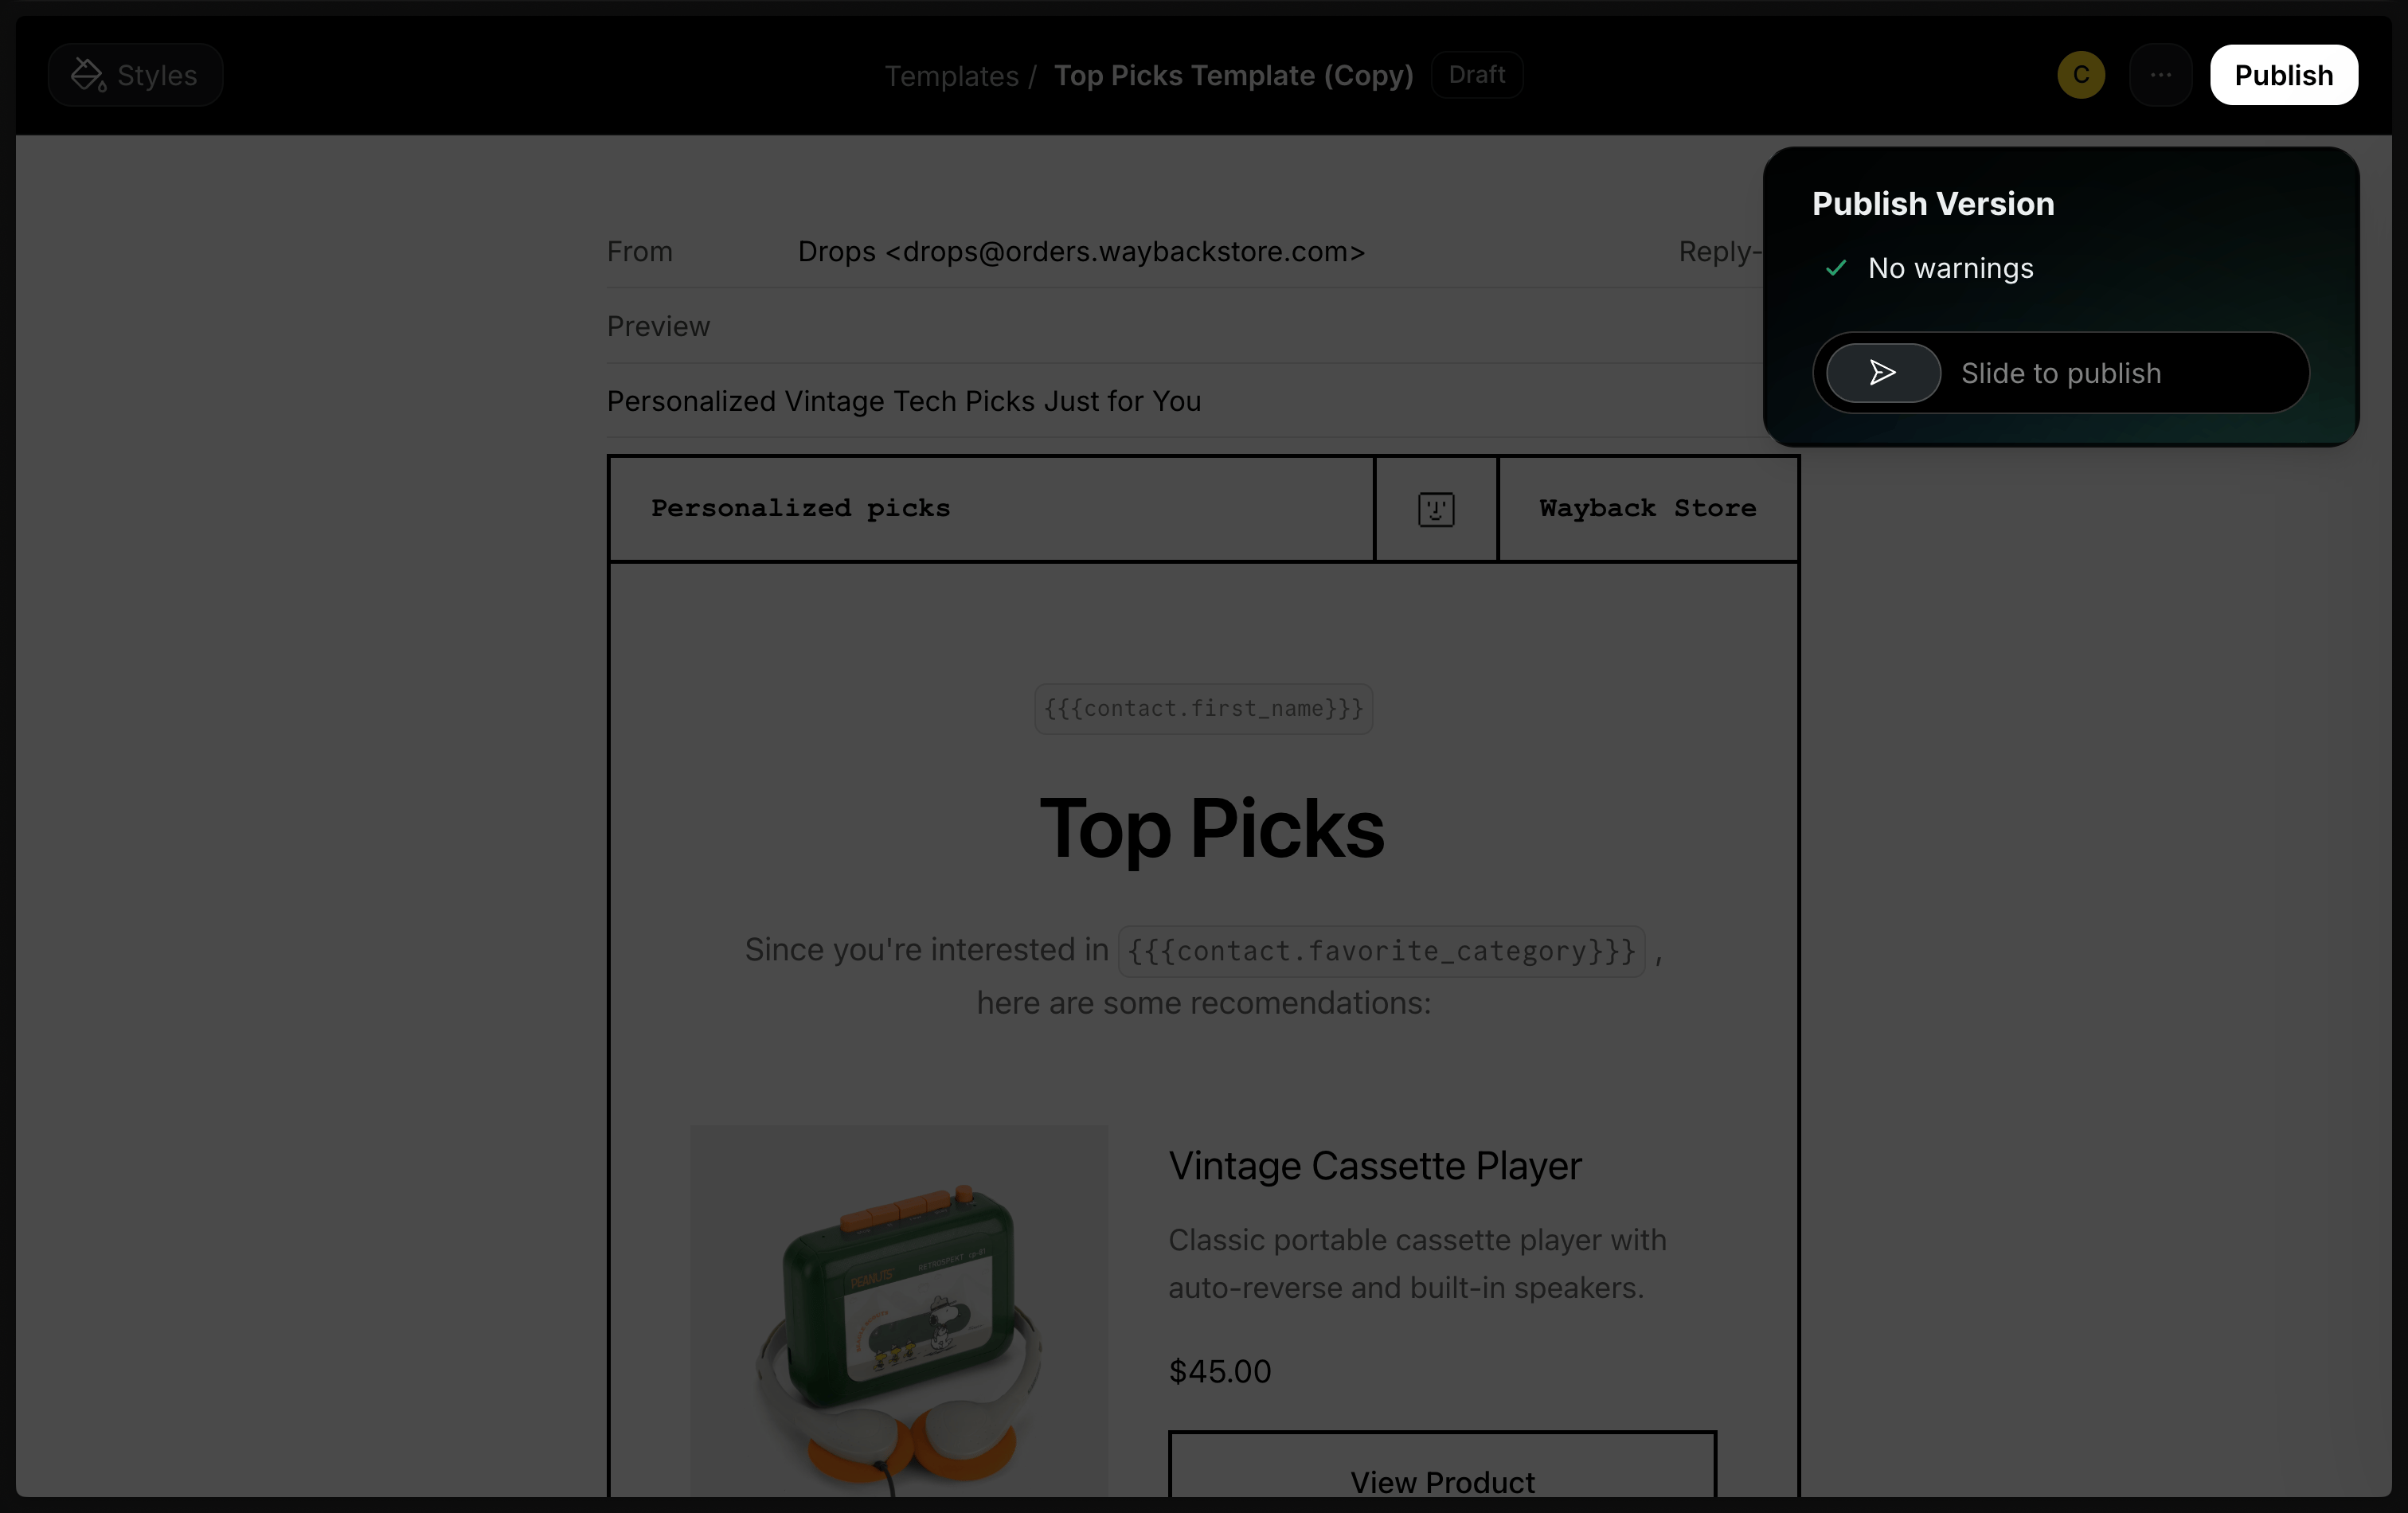
Publishto prompt Resend's review feature. This will check for any errors or concerns with your Template and allow you to catch common mistakes before publishing.Slide to confirm.
When there are no errors, the "Slide to publish" element will be active. Slide the arrow to confirm that you are ready to publish your Template. Only published Templates can be used to send emails.
Alternatively, exit the editor to leave your Template saved as a draft. It is automatically saved as you compose.
Add a Template with the API
Section titled “Add a Template with the API”Programmatically create a Template from your application with the Templates API. The payload can optionally include variables to be used in the template.
import { Resend } from 'resend';

const resend = new Resend('re_xxxxxxxxx');

await resend.templates.create({
  name: 'order-confirmation',
  from: 'Resend Store <store@example.com>',
  subject: 'Thanks for your order!',
  html: '<p>Name: {{{PRODUCT}}}</p><p>Total: {{{PRICE}}}</p>',
  variables: [
    {
      key: 'PRODUCT',
      type: 'string',
      fallbackValue: 'item',
    },
    {
      key: 'PRICE',
      type: 'number',
      fallbackValue: 20,
    },
  ],
});$resend = Resend::client('re_xxxxxxxxx');
$resend->templates->create([
'name' => 'order-confirmation',
'from' => 'Resend Store <store@example.com>',
'subject' => 'Thanks for your order!',
'html' => '<p>Name: {{{PRODUCT}}}</p><p>Total: {{{PRICE}}}</p>',
'variables' => [
[
'key' => 'PRODUCT',
'type' => 'string',
'fallback_value' => 'item'
],
[
'key' => 'PRICE',
'type' => 'number',
'fallback_value' => 49.99
]
]
]);import resend
resend.api_key = "re_xxxxxxxxx"
params: resend.Templates.CreateParams = {
"name": "order-confirmation",
"from": "Resend Store <store@example.com>",
"subject": "Thanks for your order!",
"html": "<p>Name: {{{PRODUCT}}}</p><p>Total: {{{PRICE}}}</p>",
"variables": [
{
"key": "PRODUCT",
"type": "string",
"fallback_value": "item",
},
{
"key": "PRICE",
"type": "number",
"fallback_value": 20,
},
],
}
resend.Templates.create(params)require "resend"
Resend.api_key = "re_xxxxxxxxx"
Resend::Templates.create(
name: "order-confirmation",
from: "Resend Store <store@example.com>",
subject: "Thanks for your order!",
html: "<p>Name: {{{PRODUCT}}}</p><p>Total: {{{PRICE}}}</p>",
variables: [
{
key: "PRODUCT",
type: "string",
fallback_value: "item"
},
{
key: "PRICE",
type: "number",
fallback_value: 20
}
]
)import "github.com/resend/resend-go/v4"
client := resend.NewClient("re_xxxxxxxxx")
client.Templates.Create(&resend.CreateTemplateRequest{
Name: "order-confirmation",
From: "Resend Store <store@example.com>",
Subject: "Thanks for your order!",
Html: "<p>Name: {{{PRODUCT}}}</p><p>Total: {{{PRICE}}}</p>",
Variables: []*resend.TemplateVariable{
{
Key: "PRODUCT",
Type: resend.VariableTypeString,
FallbackValue: "item",
},
{
Key: "PRICE",
Type: resend.VariableTypeNumber,
FallbackValue: 20,
},
},
})use resend_rs::{
types::{CreateTemplateOptions, Variable, VariableType},
Resend, Result,
};
#[tokio::main]
async fn main() -> Result<()> {
let resend = Resend::new("re_xxxxxxxxx");
let name = "order-confirmation";
let from = "Resend Store <store@example.com>";
let subject = "Thanks for your order!";
let html = "<p>Name: {{{PRODUCT}}}</p><p>Total: {{{PRICE}}}</p>";
let variables = [
Variable::new("PRODUCT", VariableType::String).with_fallback("item"),
Variable::new("PRICE", VariableType::Number).with_fallback(20)
];
let opts = CreateTemplateOptions::new(name, html)
.with_from(from)
.with_subject(subject)
.with_variables(&variables);
let template = resend.templates.create(opts).await?;
let _published = resend.templates.publish(&template.id).await?;
Ok(())
}import com.resend.*;
import com.resend.core.exception.ResendException;
import com.resend.services.templates.model.CreateTemplateOptions;
import com.resend.services.templates.model.CreateTemplateResponseSuccess;
import com.resend.services.templates.model.Variable;
import com.resend.services.templates.model.VariableType;
public class Main {
public static void main(String[] args) throws ResendException {
Resend resend = new Resend("re_xxxxxxxxx");
CreateTemplateOptions params = CreateTemplateOptions.builder()
.name("order-confirmation")
.from("Resend Store <store@example.com>")
.subject("Thanks for your order!")
.html("<p>Name: {{{PRODUCT}}}</p><p>Total: {{{PRICE}}}</p>")
.addVariable(new Variable("PRODUCT", VariableType.STRING, "item"))
.addVariable(new Variable("PRICE", VariableType.NUMBER, 20))
.build();
CreateTemplateResponseSuccess data = resend.templates().create(params);
}
}using Resend;
IResend resend = ResendClient.Create("re_xxxxxxxxx");
var variables = new List<TemplateVariable>
{
new TemplateVariable() {
Key = "PRODUCT",
Type = TemplateVariableType.String,
Default = "item",
},
new TemplateVariable() {
Key = "PRICE",
Type = TemplateVariableType.Number,
Default = 20,
},
};
var resp = await resend.TemplateCreateAsync(
new TemplateData()
{
Name = "order-confirmation",
From = "Resend Store <store@example.com>",
Subject = "Thanks for your order!",
HtmlBody = "<p>Name: {{{PRODUCT}}}</p><p>Total: {{{PRICE}}}</p>",
Variables = variables,
}
);
Console.WriteLine($"Template Id={resp.Content}");curl -X POST 'https://api.resend.com/templates' \
-H 'Authorization: Bearer re_xxxxxxxxx' \
-H 'Content-Type: application/json' \
-d $'{
"name": "order-confirmation",
"from": "Resend Store <store@example.com>",
"subject": "Thanks for your order!",
"html": "<p>Name: {{{PRODUCT}}}</p><p>Total: {{{PRICE}}}</p>",
"variables": [
{
"key": "PRODUCT",
"type": "string",
"fallback_value": "item"
},
{
"key": "PRICE",
"type": "number",
"fallback_value": 20
}
]
}'Add a Template from an existing file
Section titled “Add a Template from an existing file”You can create a Template from existing resources such as an HTML or React Email file.
Create a new Template in the Dashboard, then paste or drag in your HTML or React Email content.
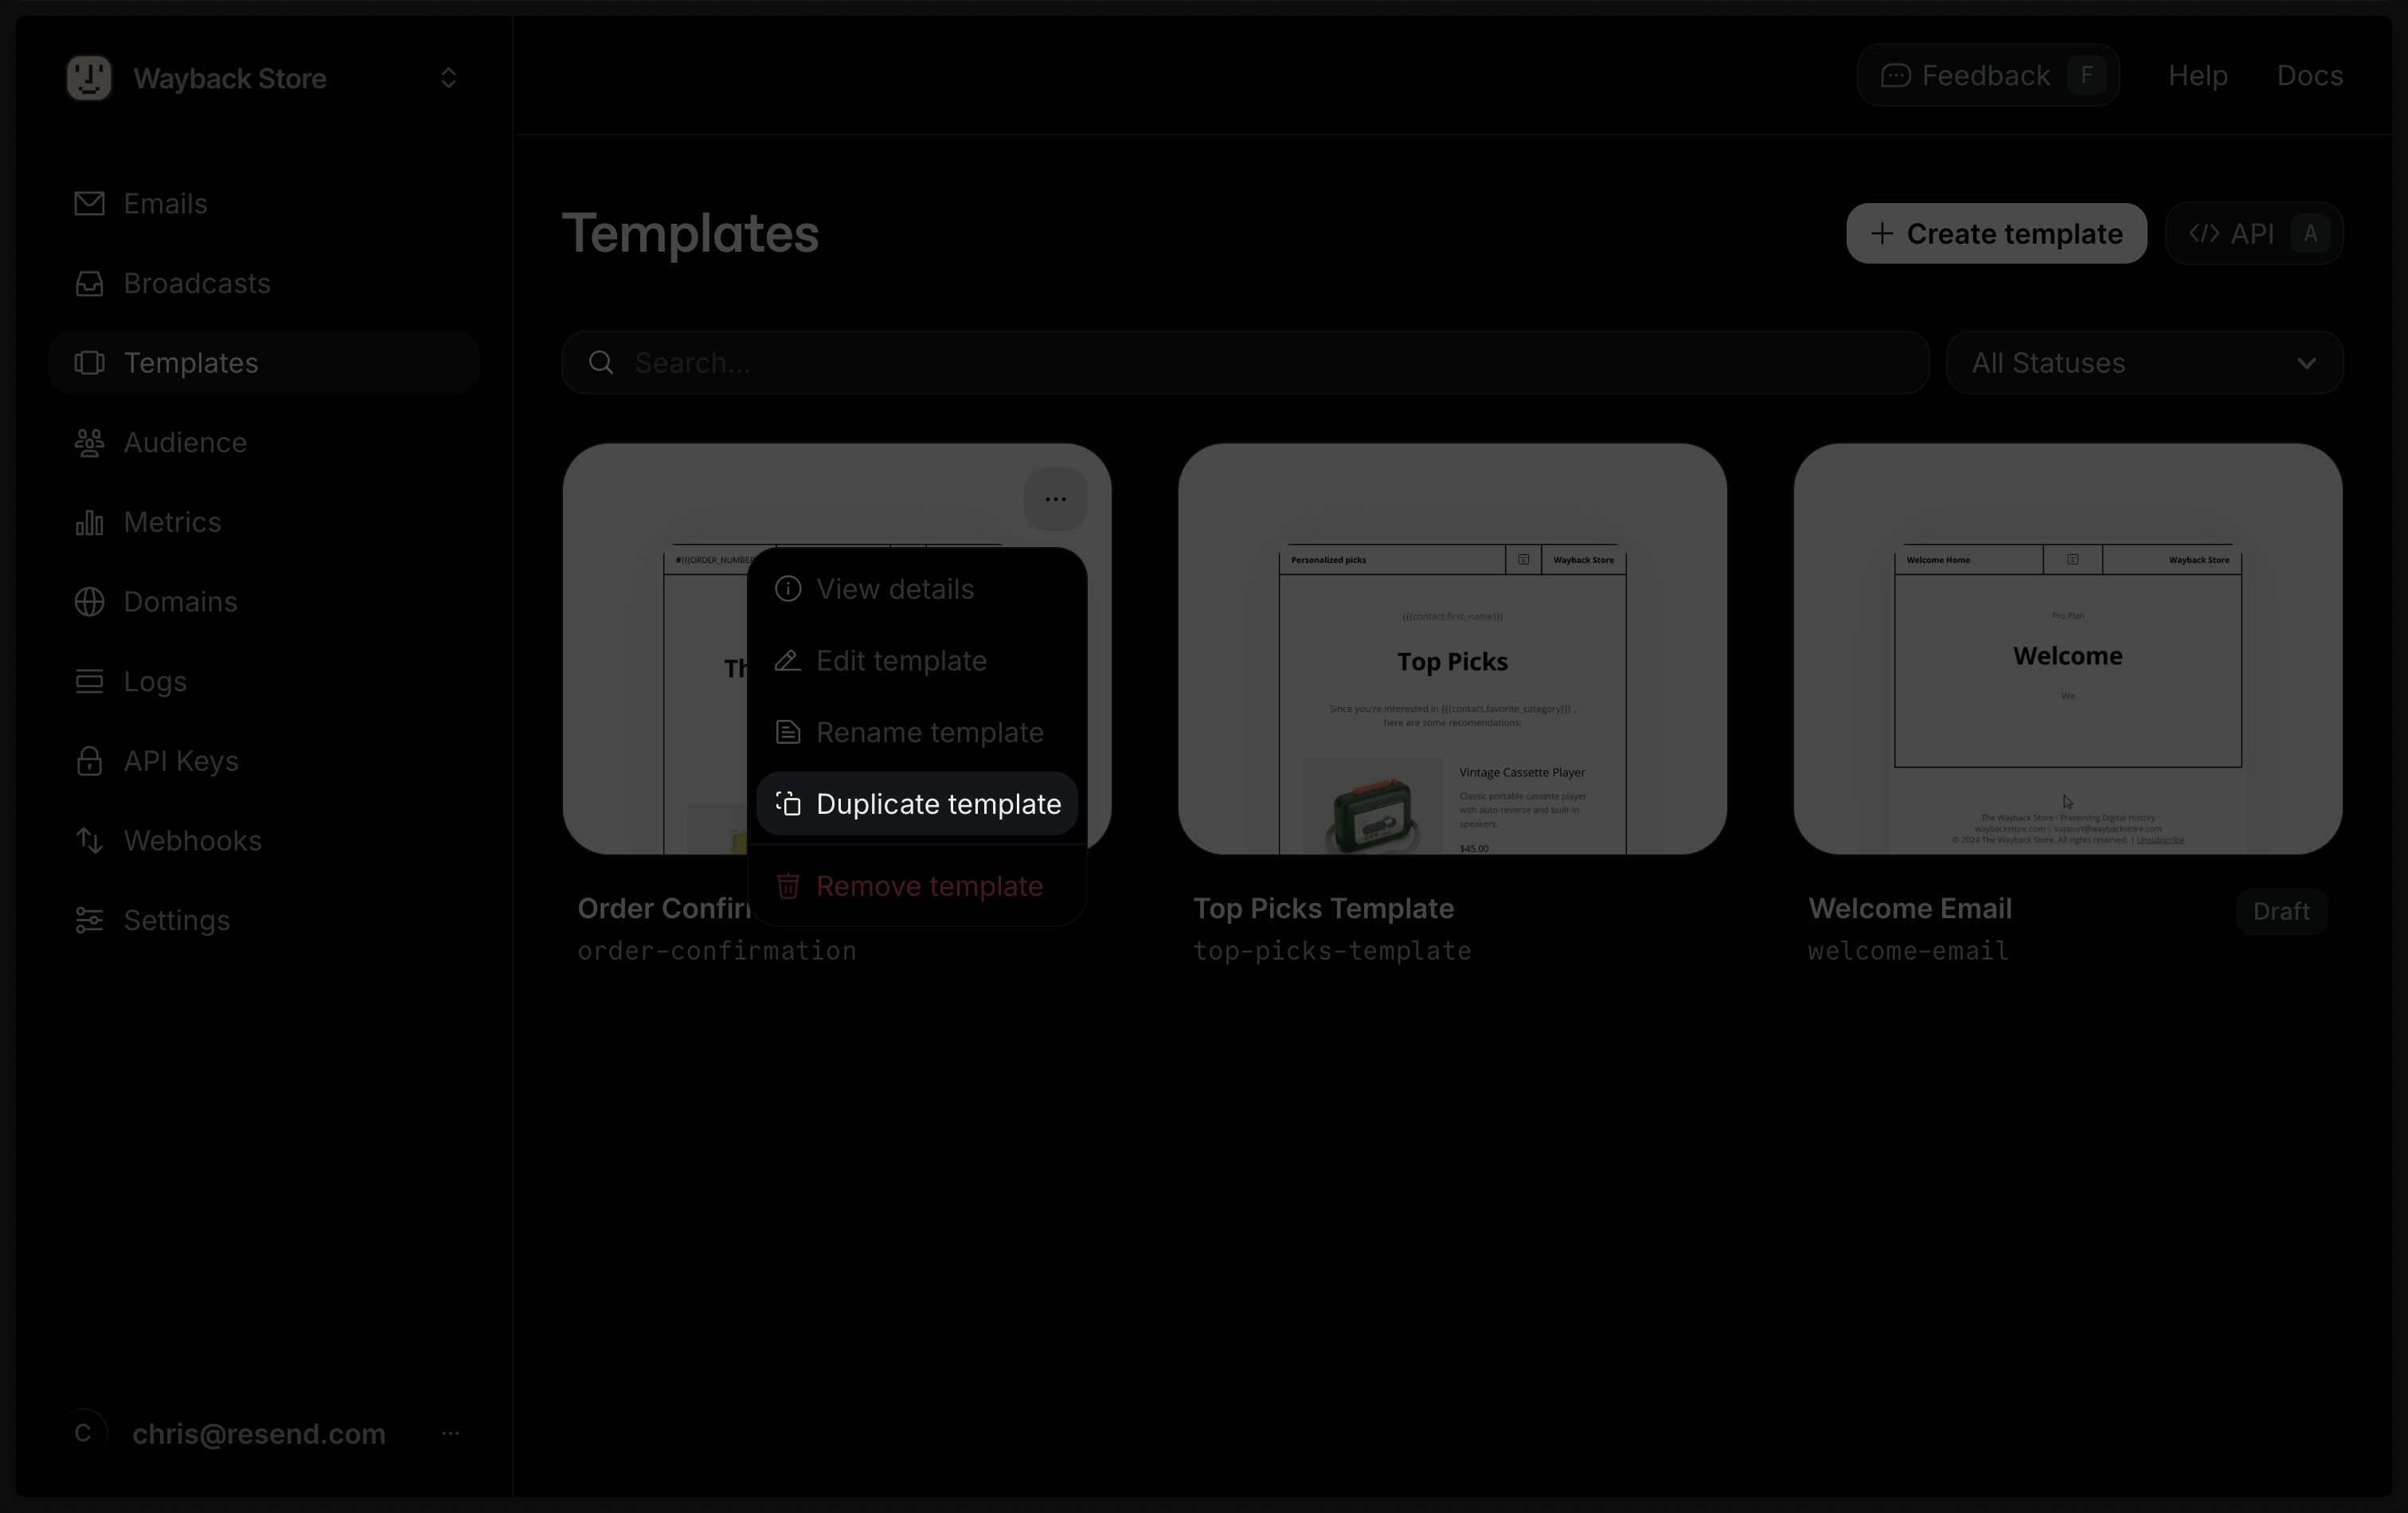
Duplicate a Template
Section titled “Duplicate a Template”You can duplicate an existing Template in the Dashboard, via the Templates API, or with a Templates CLI command.
Clone a Broadcast
Section titled “Clone a Broadcast”You can turn any sent Broadcast into a reusable Template. Cloning reuses a Broadcast's design and content as a starting point for transactional emails.
Locate your desired Broadcast in the Broadcast dashboard, click the more options button , and choose Clone as Template.
Publish a Template
Section titled “Publish a Template”By default, Templates are in a draft state. To use a Template to send emails, you must first publish it via the Dashboard, using the Templates API, or with a Templates CLI command.
For a more streamlined flow in your application, you can create and publish a Template in a single step.
import { Resend } from 'resend';

const resend = new Resend('re_xxxxxxxxx');

const { data, error } = await resend.templates
  .create({
    name: 'order-confirmation',
    html: '<p>Thanks for your order!</p>',
  })
  .publish();
Edit a Template
Section titled “Edit a Template”You can only send emails using the most recently published version of a Template. Once a Template is published, you can continue to edit it as a draft without impacting any emails sent using the Template.
To use an updated version of your Template, you must publish your Template again to create a new version for sending. Until you republish, any edits are only saved in draft form. After you publish a new version, your changes will then be reflected in any future emails using the Template.
Learn more about editing Templates in production safely with version history.
Delete a Template
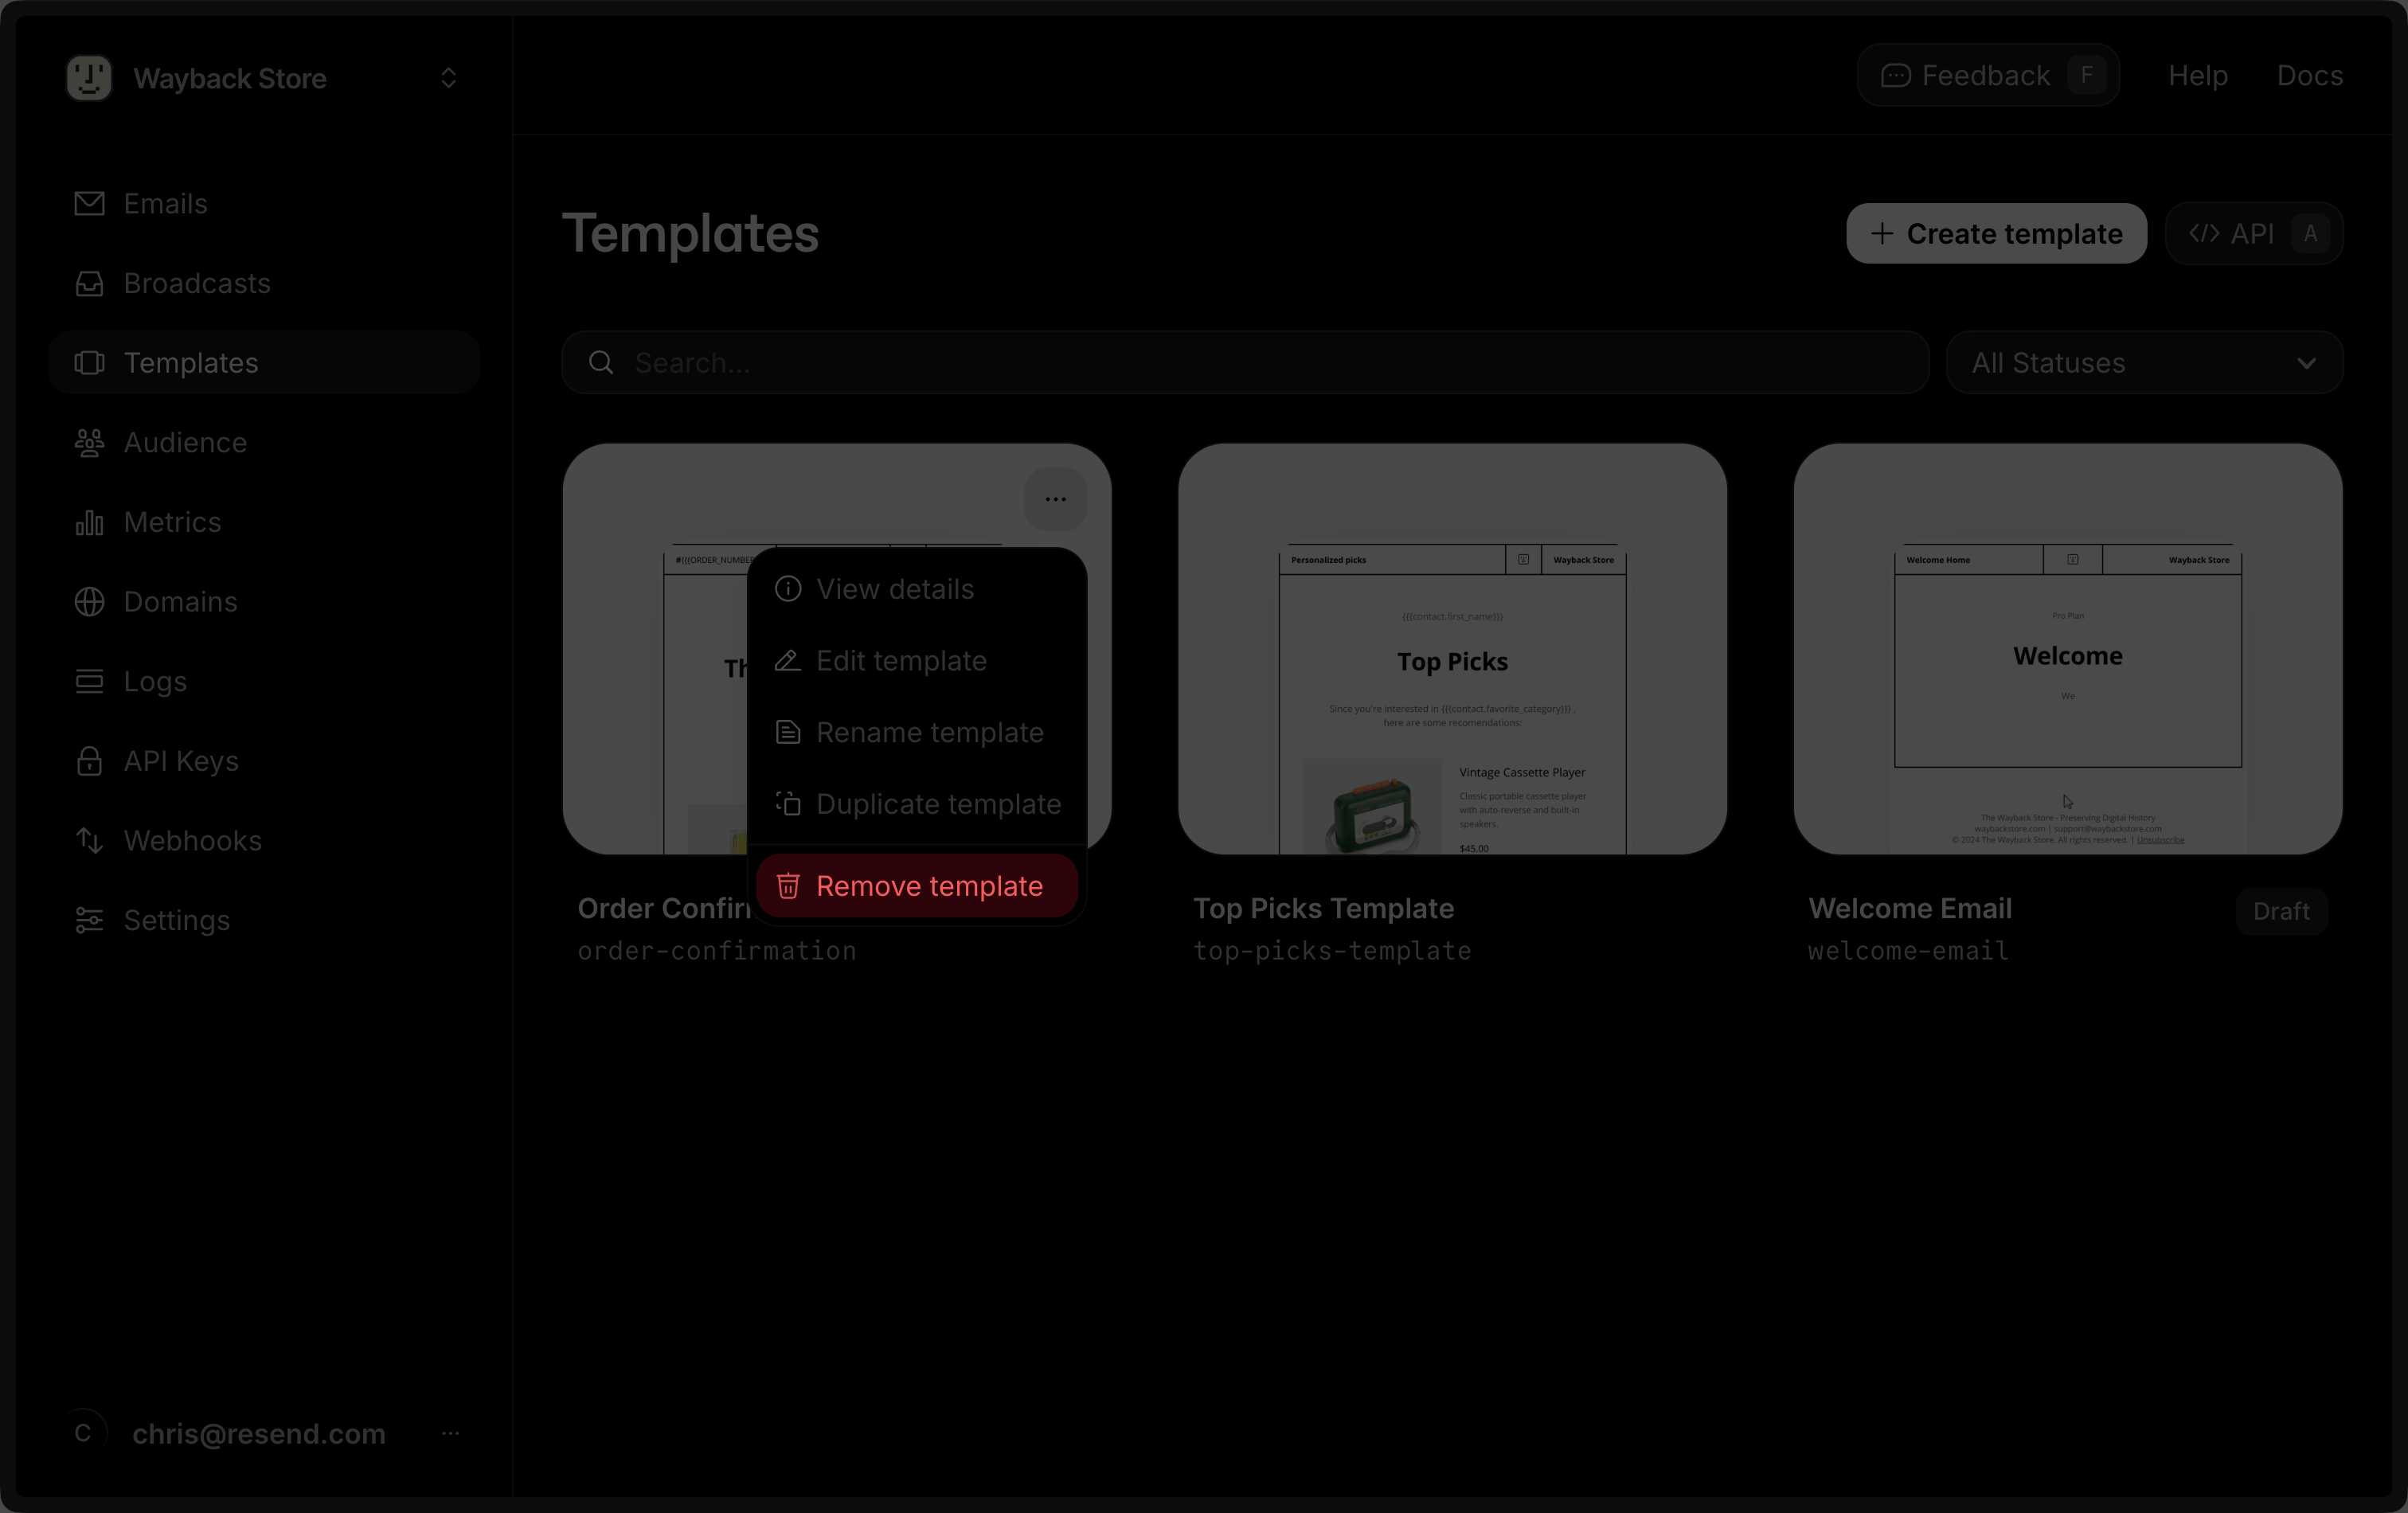
Section titled “Delete a Template”You can delete a Template via the Dashboard by clicking on the Delete button, via the Templates API, or with a Templates CLI command.
API Reference
Section titled “API Reference”For complete API documentation, see the Templates API reference and the template parameter of the Sending API.